QuickBooks and Moxo
Last updated: September 21, 2026
Moxo streamlines financial workflows by integrating natively with QuickBooks, enabling instant and seamless cross-platform payment collection. Our intelligent automation eliminates manual effort while giving teams added efficiency, accuracy, and security across their payment collection processes.
Adding a QuickBooks Automation to a Flow Template and an Instant Flow:
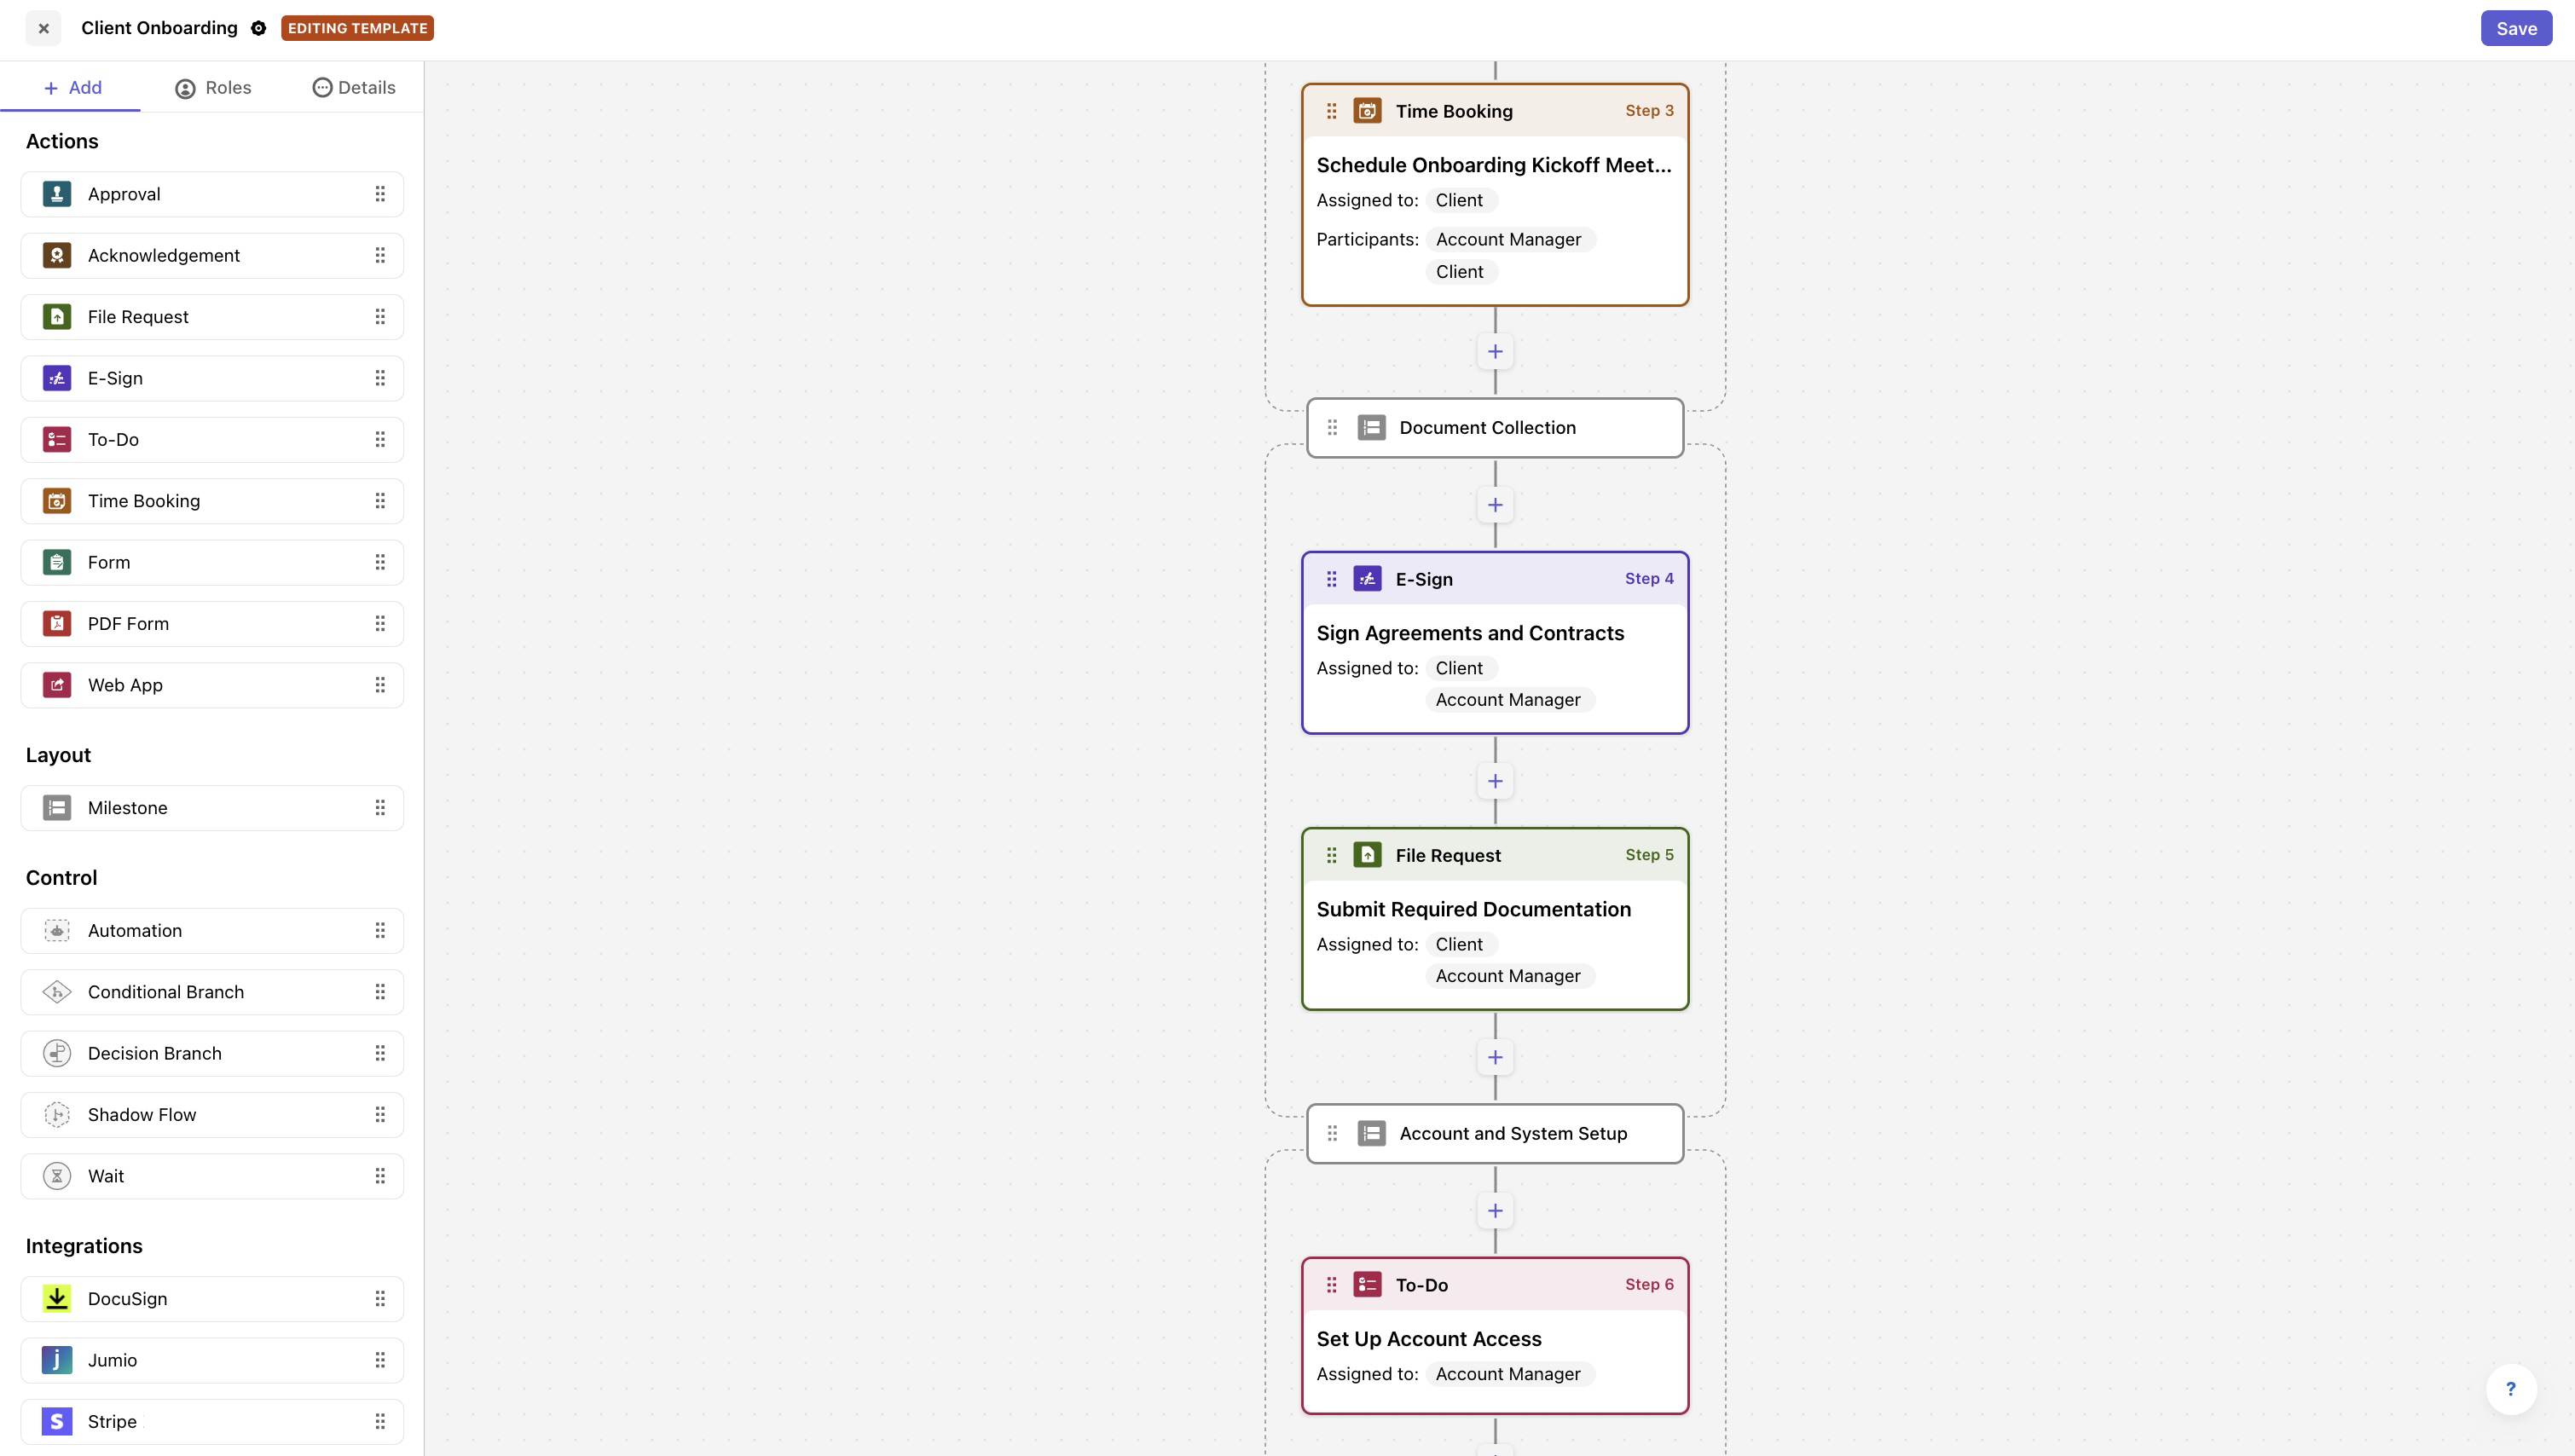
Once you are in the Flow Builder, locate the desired step after which you want to add the automation.
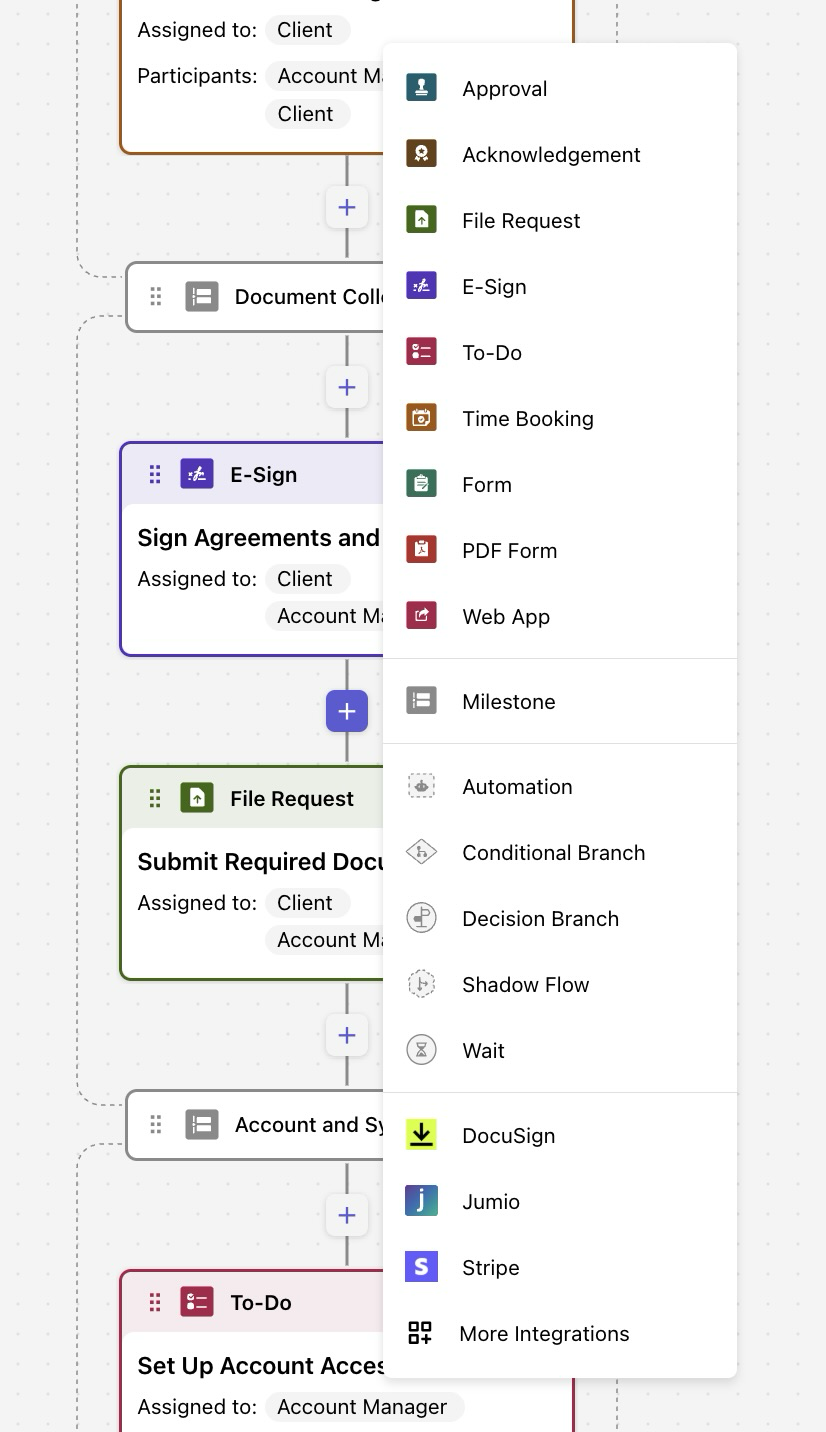
Drag and drop Automation from the left-hand panel under Control or click the “+” icon between action steps in the flow and select Automation.
Adding a QuickBooks Automation to a Live Flow:
Navigate to the desired Flow Workspace.
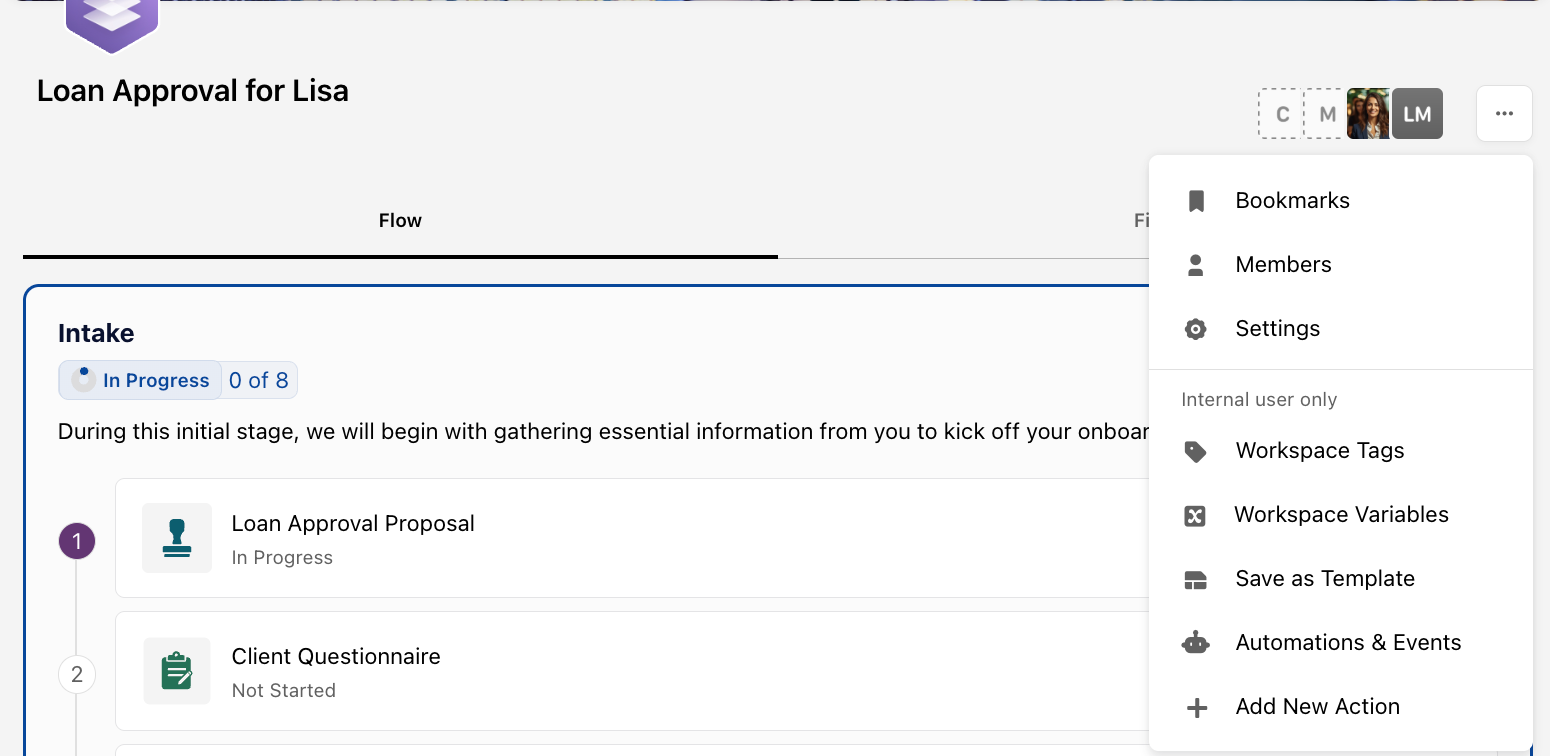
Click on the “...” ellipsis icon.

Select + Add New Action from the dropdown menu.
Scroll to and select Automation under Control.
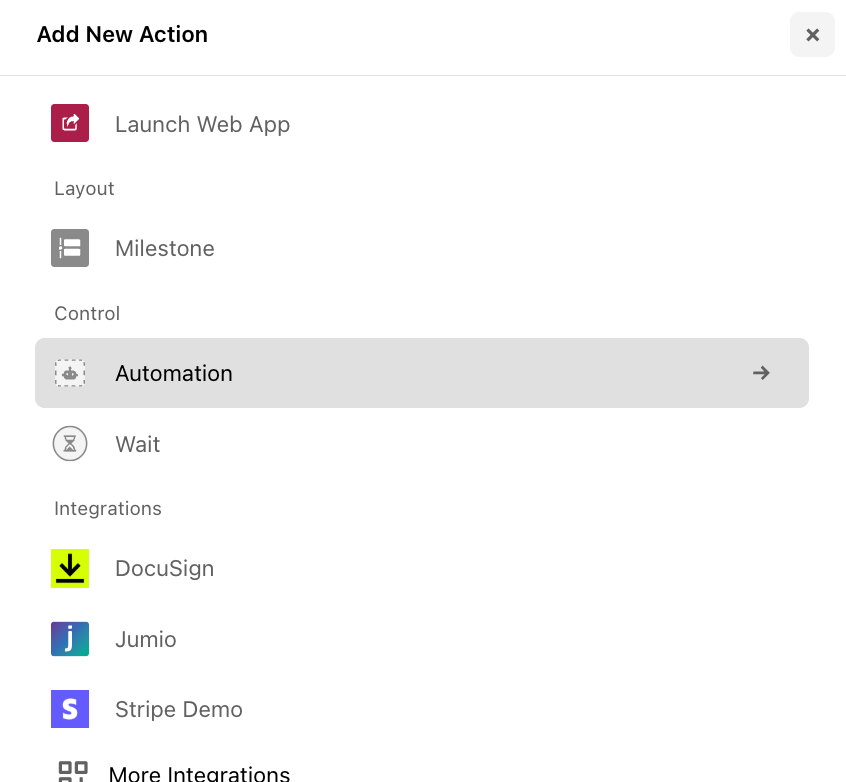
Locate the relevant step in the flow and click + Add Here.
Configuring QuickBooks Online:
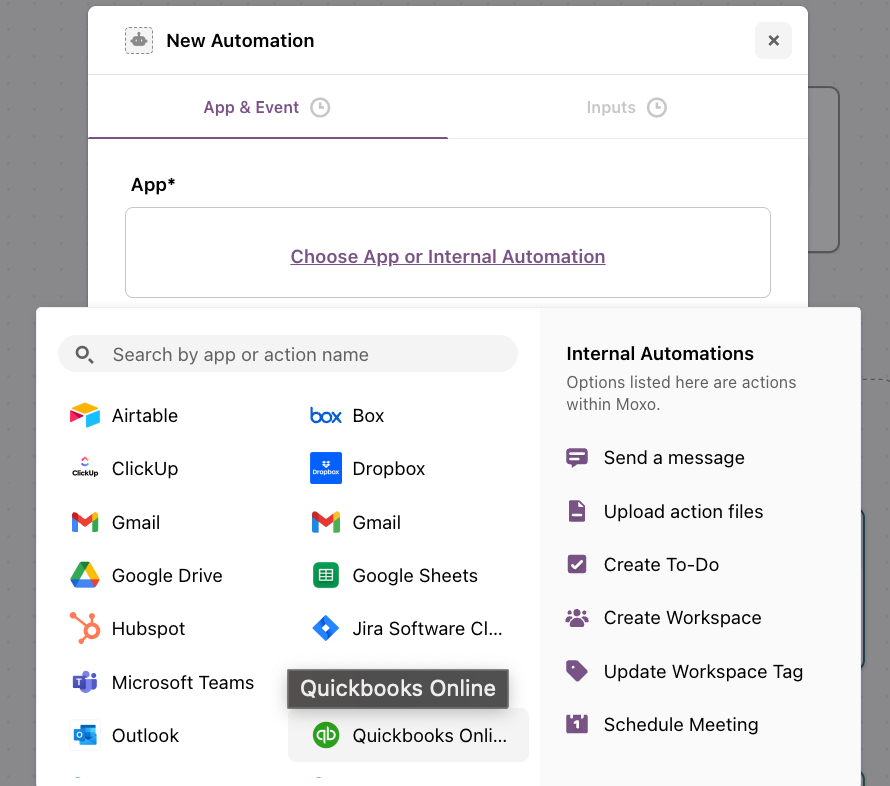
In the automation interface, choose QuickBooks Online from the available systems.
Step 1: Set Up App and Event
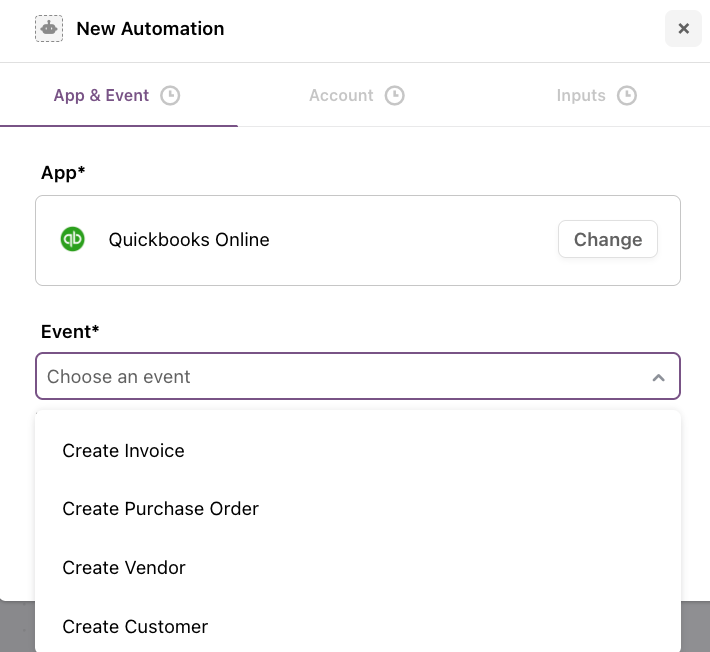
Select QuickBooks Online as the app.
Choose one of the following events:
Create Invoice
Create Purchase Order
Create Vendor
Create Customer
Click Next to proceed.
Step 2: Account Setup
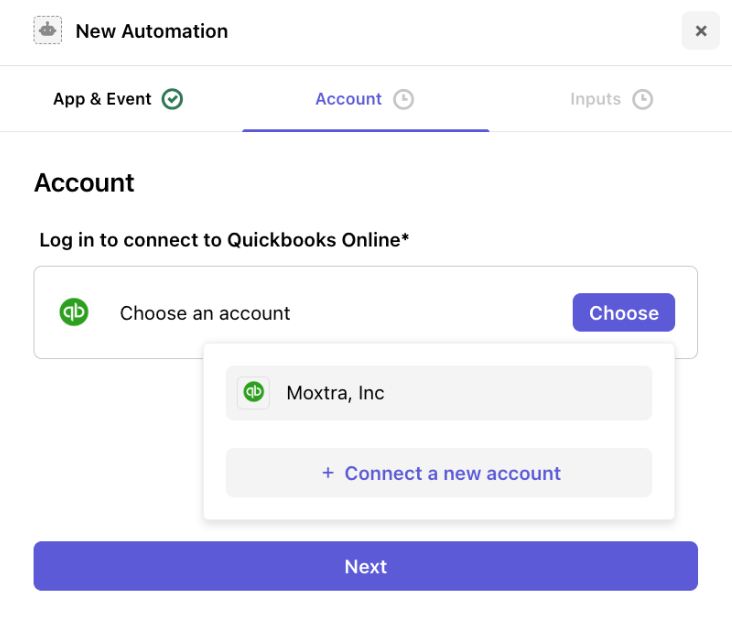
Click + Connect a New Account to add an account, or click Choose to select from a pre-configured QuickBooks account.
Once connected, click Next to proceed.
Step 3: Add Input Details
If you choose Create Invoice as the event:
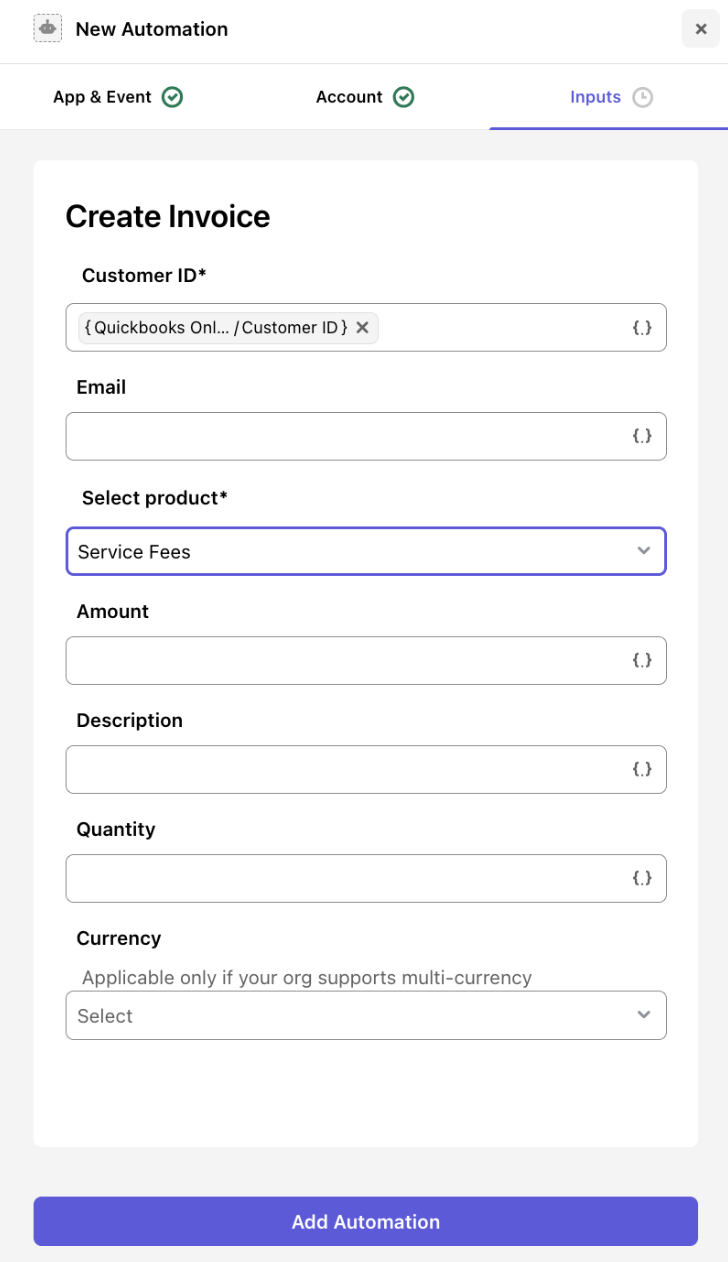
Fill in the following fields:
Customer ID*: Select an existing customer or enter the customer ID
Email: Enter the customer's email address
Select Product*: Choose a product or service from your list.
Amount: Specify the total amount of the invoice.
Description: Provide a description for the invoice line item(s)
Quantity: Specify the quantity for each product or service
Currency: Select a currency from the dropdown (only applicable if multi-currency is enabled)
Once complete, click Next to review the automation details, and select Add Automation.
If you choose Create Purchase Order as the event:
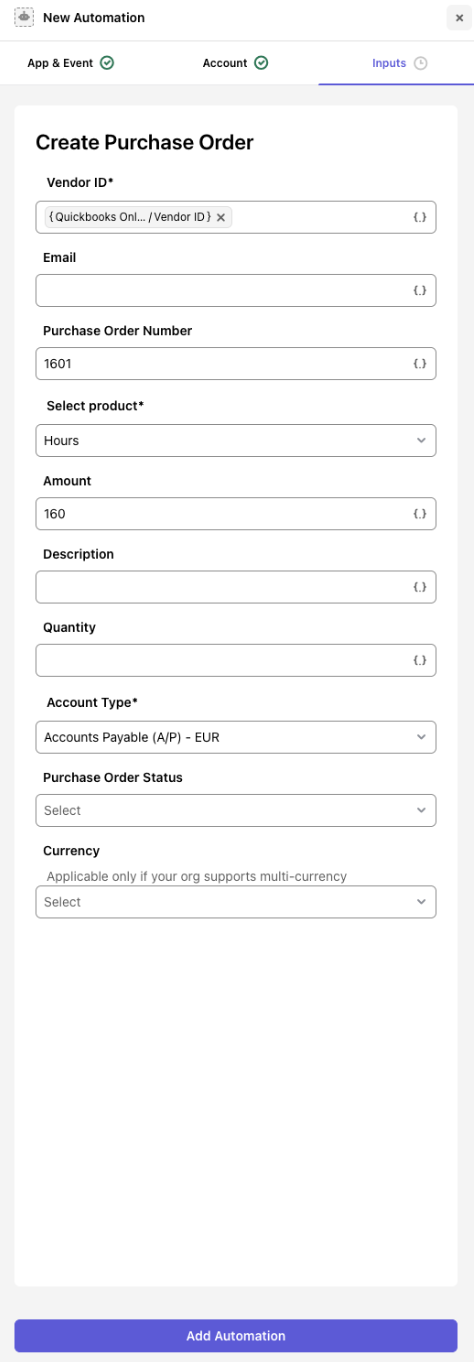
Fill in the following fields:
Vendor: Choose an existing vendor from QuickBooks or create a new one with name, address, and contact details
Item Details: Enter the items to purchase, including:
Description
Quantity
Unit Price
Notes (optional)
Purchase Order Date: Specify the date the purchase order is being created
Shipping Address: Select a customer from the dropdown and confirm the address if applicable
Additional Fields: Add custom fields such as project codes or internal references
Click Add Automation.
If you choose Create Vendor as the event:

Provide the following input details:
Full Name: Enter the vendor's full name
Contact Information: Include phone number, email, and website (if available)
Address Details: Include street address, city, state code, and zip code.
After completing the fields, click Next, then Add Automation.
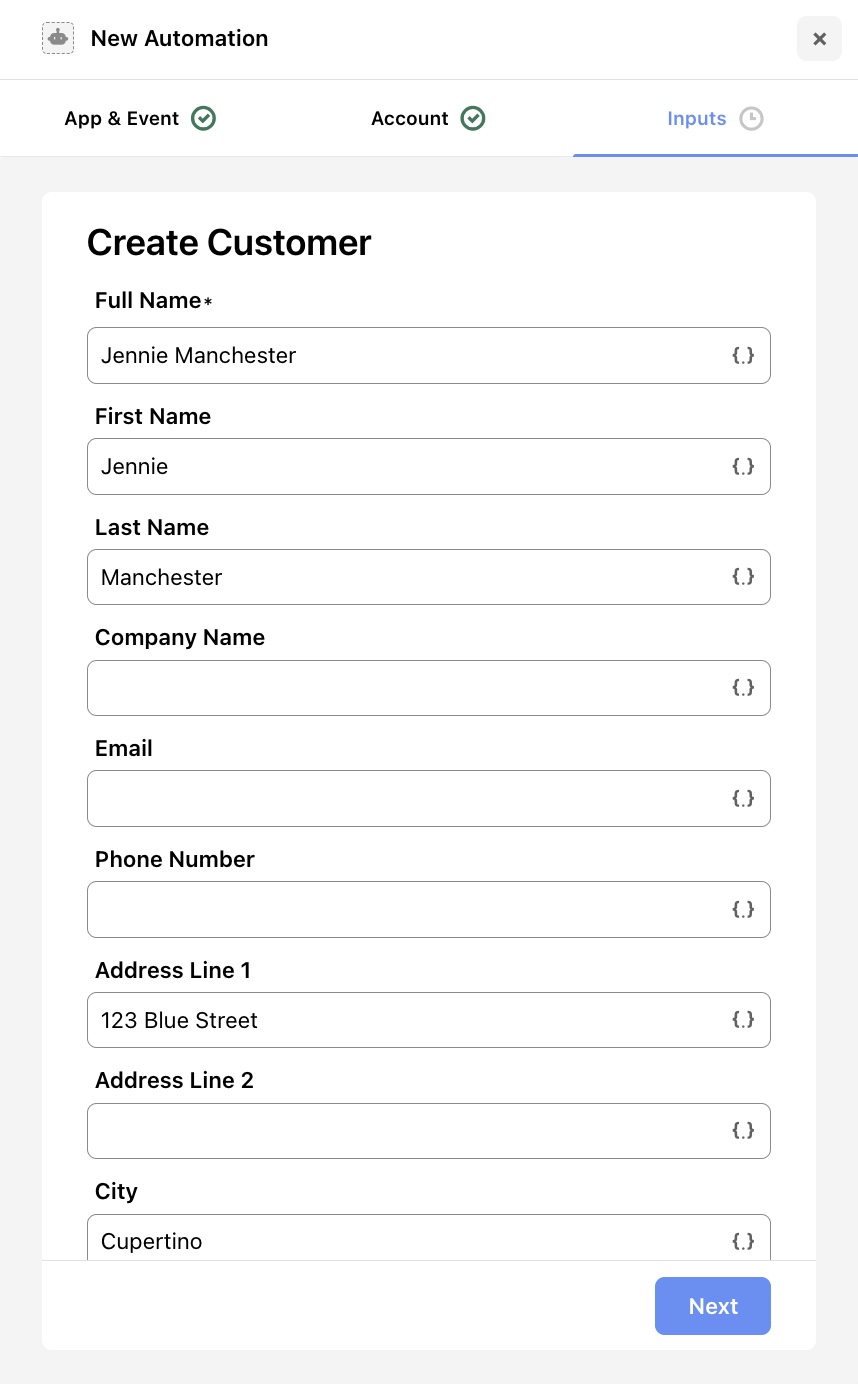
If you choose Create Customer as the event:
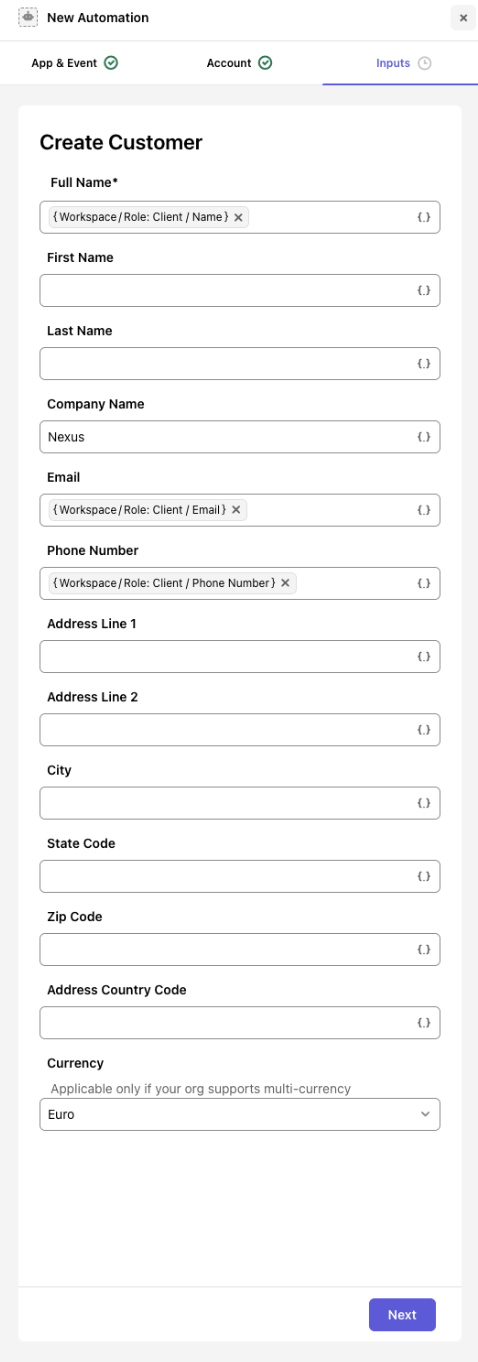
Fill in the following customer details:
Full Name
First Name / Last Name
Address Line 1 / Address Line 2
City, State Code, Zip Code, and Address Country Code
Select the currency from the dropdown list
After completing the fields, click Next, then Add Automation.
Use DDR in the available fields by clicking on the “{.}” autofill icon to dynamically pull metadata from the workspace or previous actions.
Editing an Automation in a Flow Template or Live Flow:
Hover over the automation step.
Click the Edit icon. You may modify the app, event, account, or any input fields and click Save Changes to update.
Click the Delete icon to remove the automation.
Automations can only be edited in saved flow templates or in live flows where the automation step hasn’t yet completed. Once executed, the automation becomes locked.
Mapping Automations and Events in a Flow
Once a Flow is live, click on the “...” ellipsis icon next to the flow workspace name and select Automations & Events.
Here, you can view all upcoming and completed automations.

Mapping the Trigger in QuickBooks
Log into QuickBooks Online.
Navigate to the appropriate section based on the configured event.

Best Practices:
Pre-configure all necessary accounts before setting up automation.
Ensure required vendors, products, and customer data are available in QuickBooks.
Review automation mappings regularly to keep them aligned with evolving workflow needs or user roles.