HubSpot and Moxo
Last updated: September 21, 2026
Moxo’s HubSpot automation syncs client interactions, sales activities, and contact details as actions are completed in workflows. Records can be dynamically updated across contacts, companies, and deals, keeping teams aligned with accurate, real-time information across systems. The integration streamlines CRM management, eliminates manual updates, and enables data-driven collaboration for faster, more efficient customer engagement.
Adding a HubSpot Automation to a Flow Template or Instant Flow
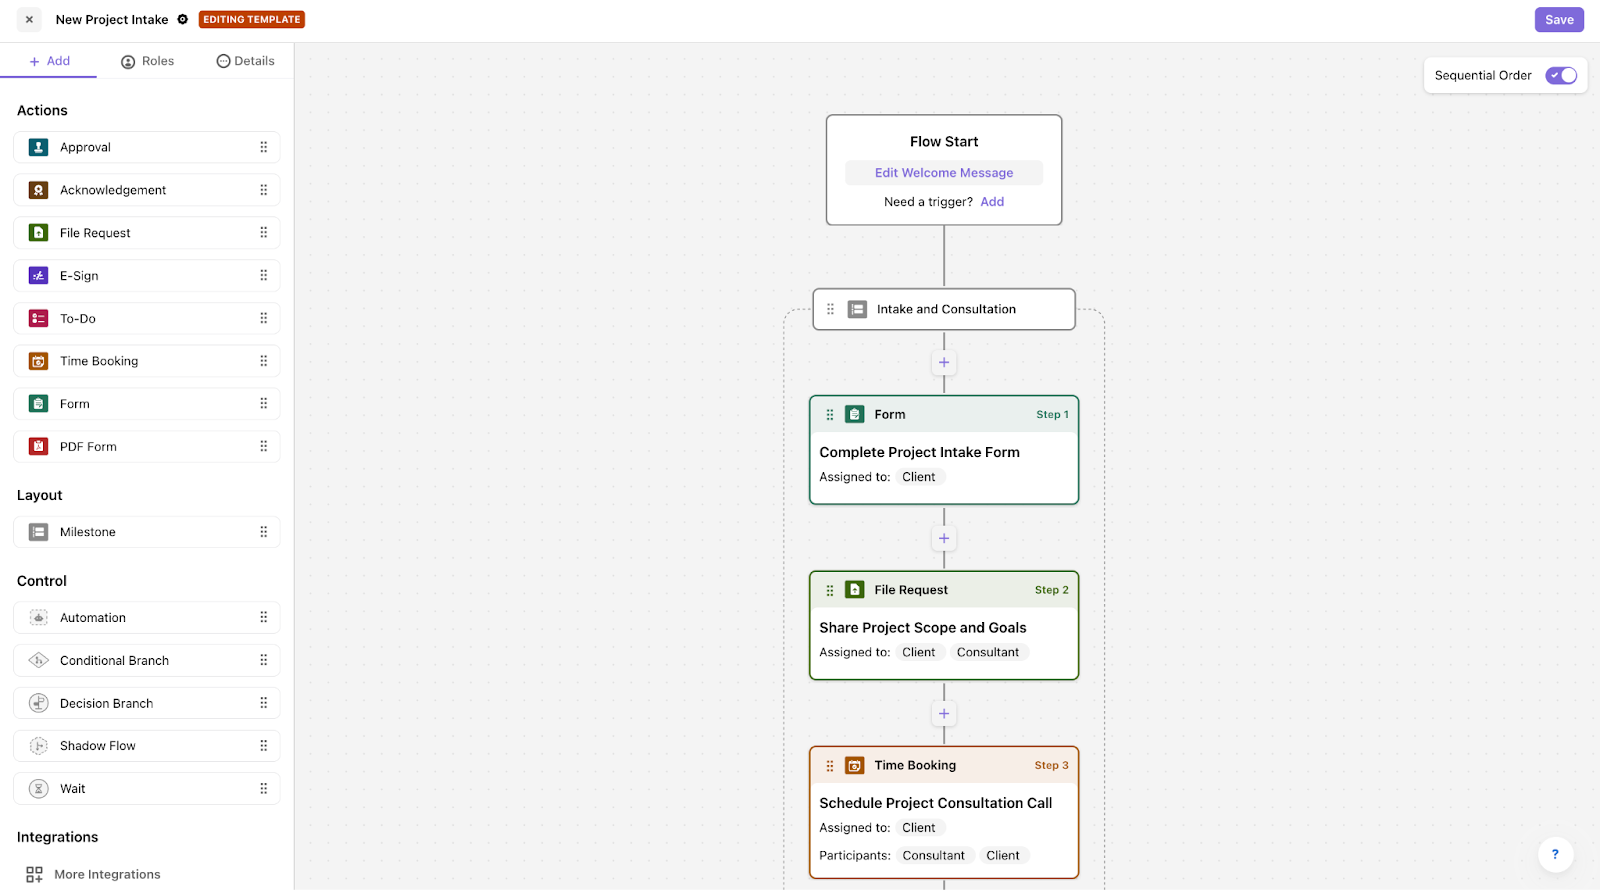
In the Flow Builder, locate the step after which you want to insert automation.
Drag and drop Automation from the left-hand Control panel, or Click the “+” icon between action steps and select Automation.
Adding a HubSpot Automation to a Live Flow
Navigate to the relevant Flow Workspace.
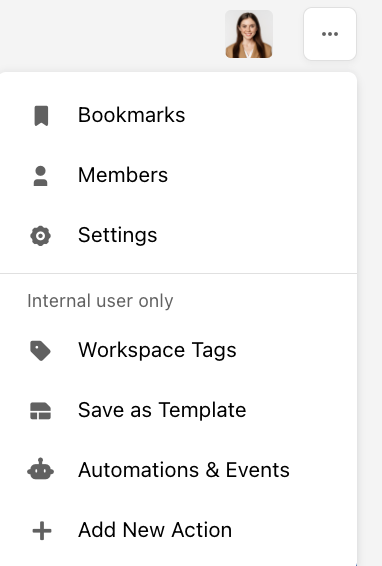
Click the "..." ellipsis icon.
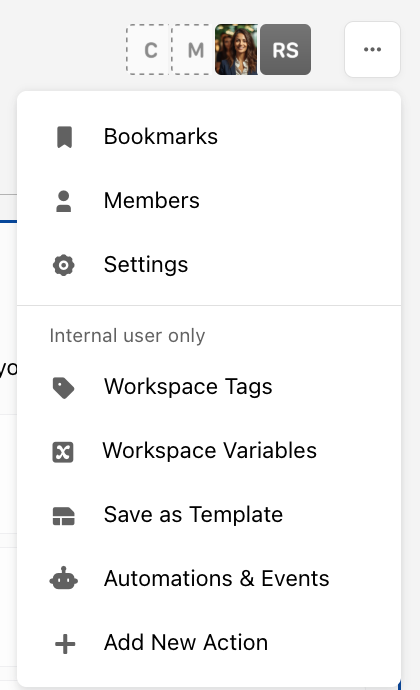
Select + Add New Action from the dropdown.
Scroll to Automation under the Control section.
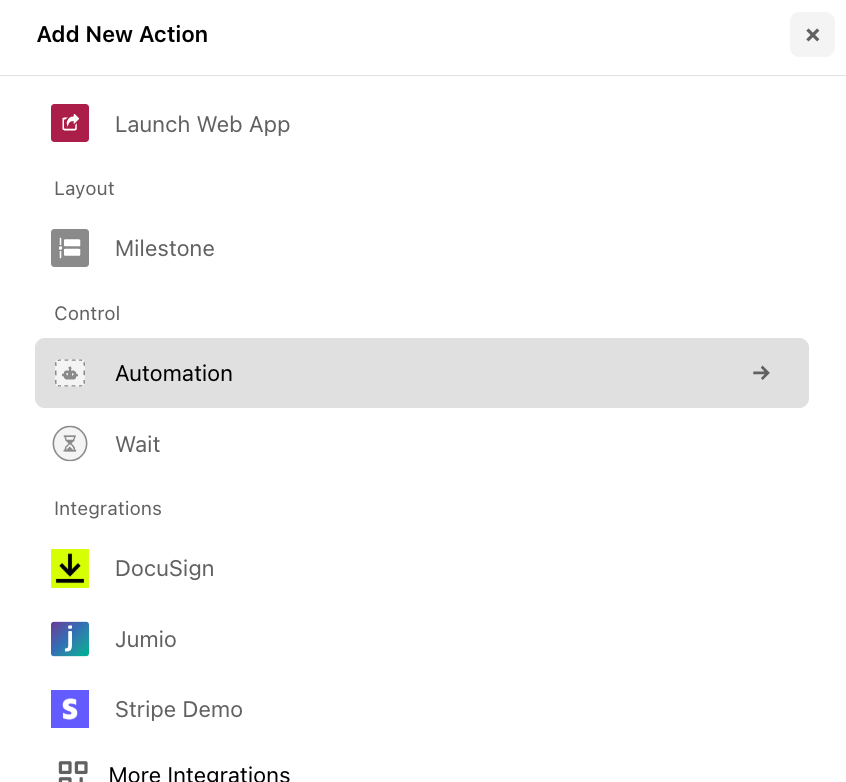
Locate the desired step and click + Add Here.
Configuring the HubSpot Automation
In the automation interface, choose HubSpot from the available systems.
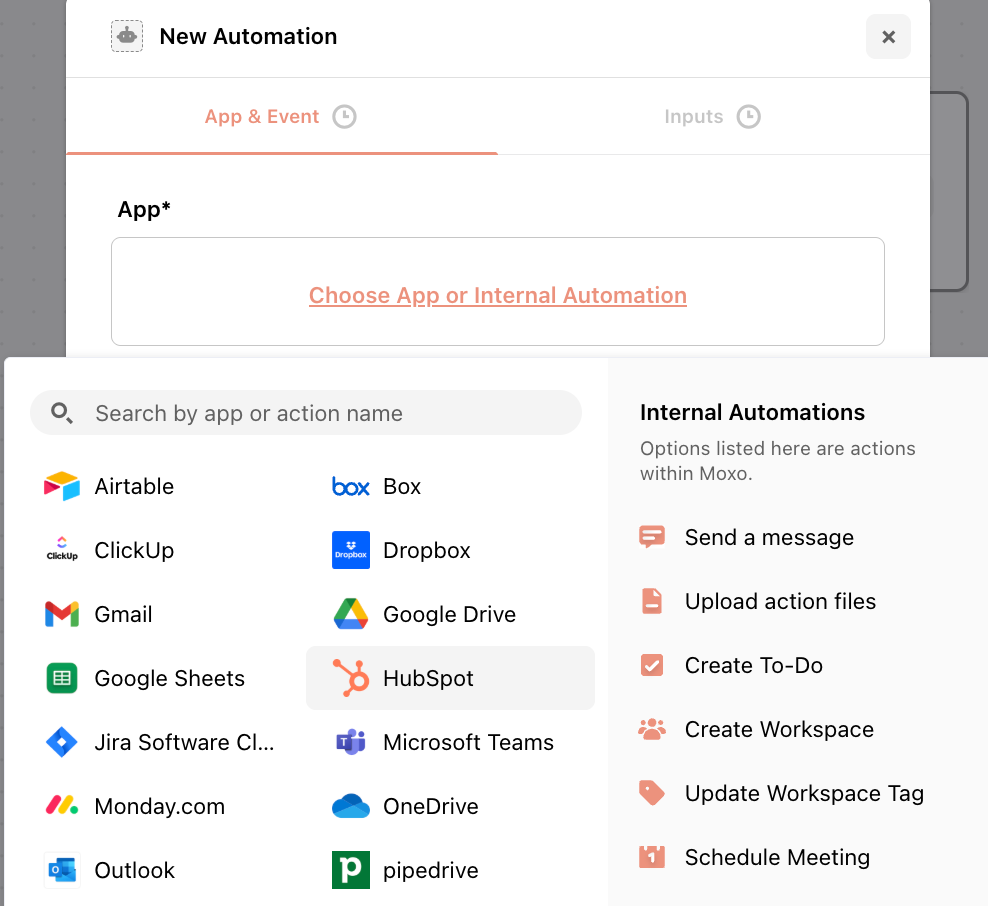
Step 1: Set Up App and Event
Select one of the supported automation events.
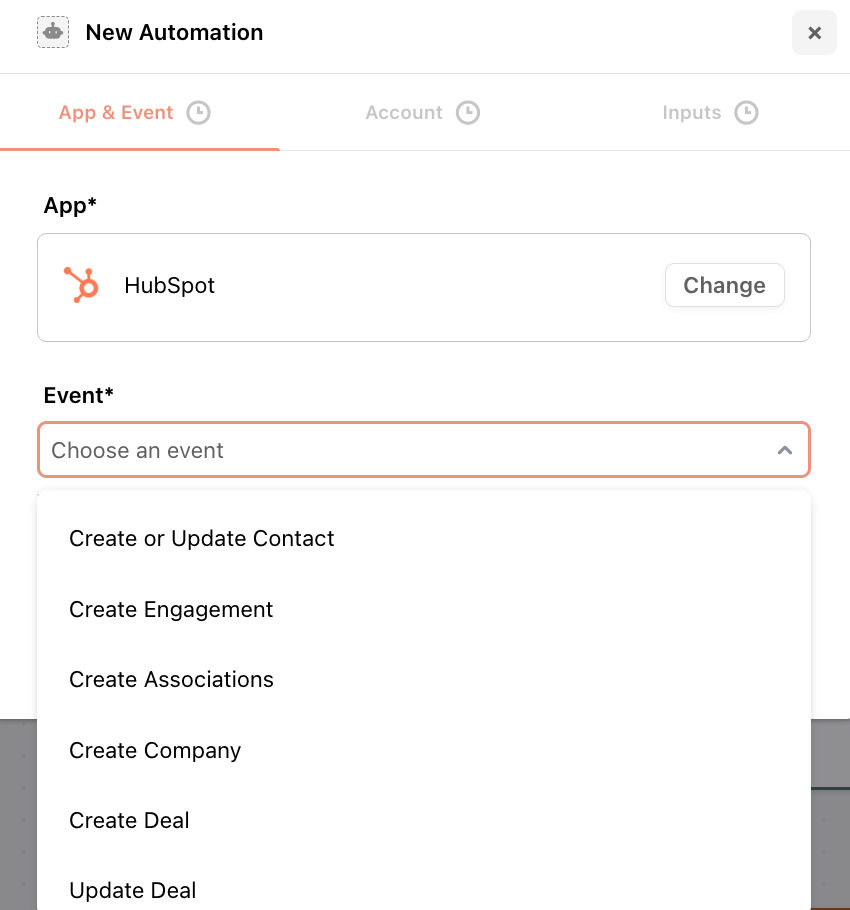
Click Next.
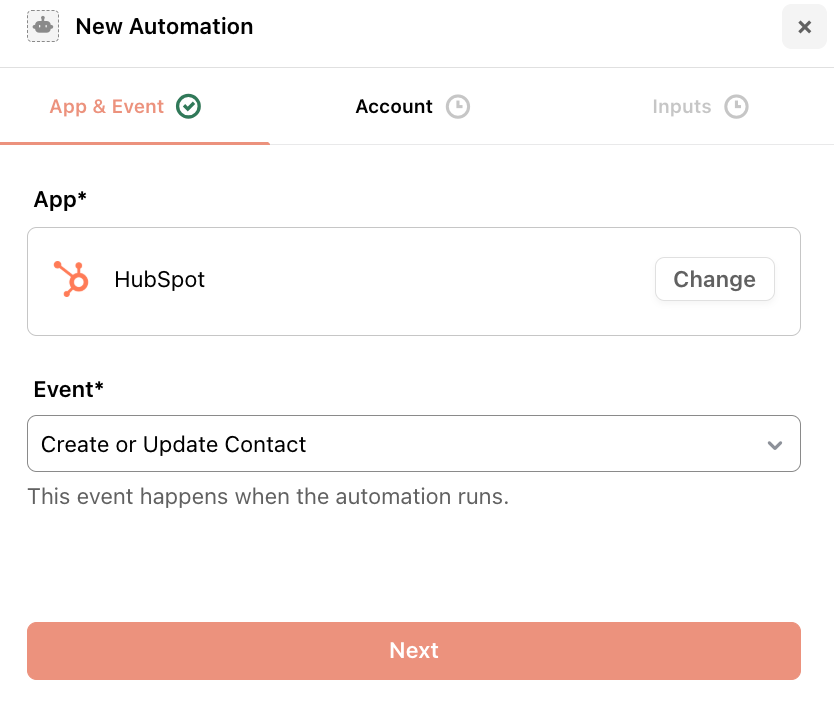
Step 2: Account Setup
Click Connect to add a new account or Choose from existing HubSpot accounts.

Once connected, click Next.
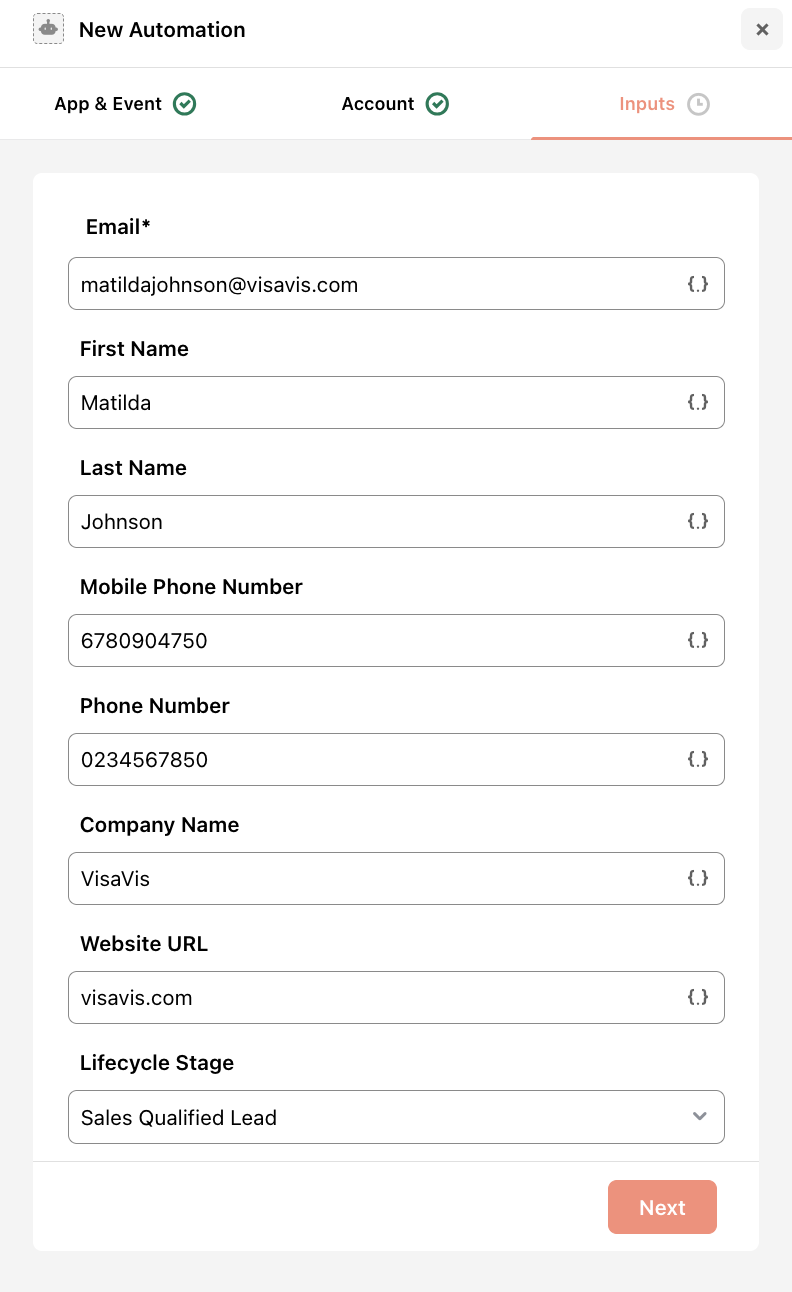
Step 3: Add Input Details
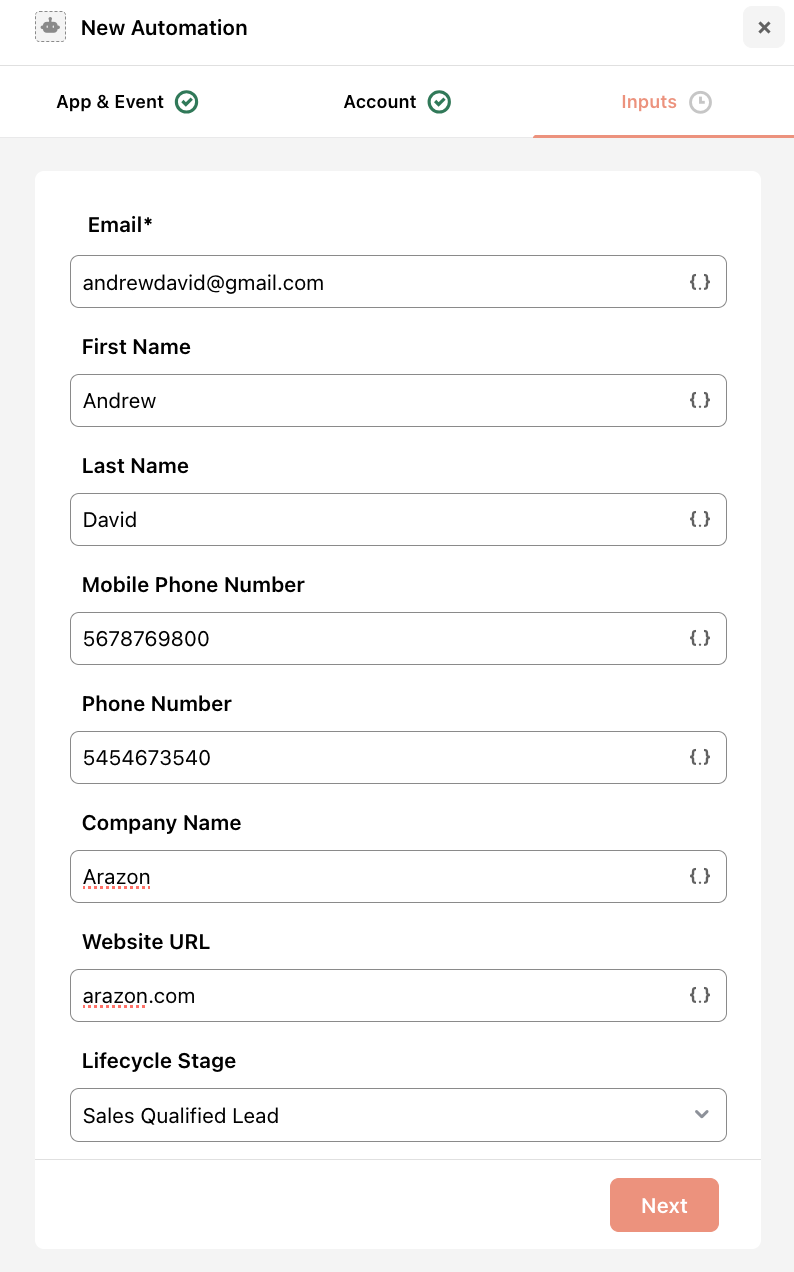
Fill in the required fields based on the selected event. Use DDR (Dynamic Data Reference) by clicking the “{.}” autofill icon to dynamically pull in data from workspace and action metadata or prior automation steps.
If you choose Create or Update Contact:
Fill in the following details:
Email (Required)
First Name
Last Name
Mobile Phone Number
Phone Number
Company Name
Website URL
Lifecycle Stage
Click Next, then Add Automation.
If you choose Create Engagement:
Select Engagement Type: Choose an engagement type from the dropdown: Note, Task, Meeting, Email, or Call.
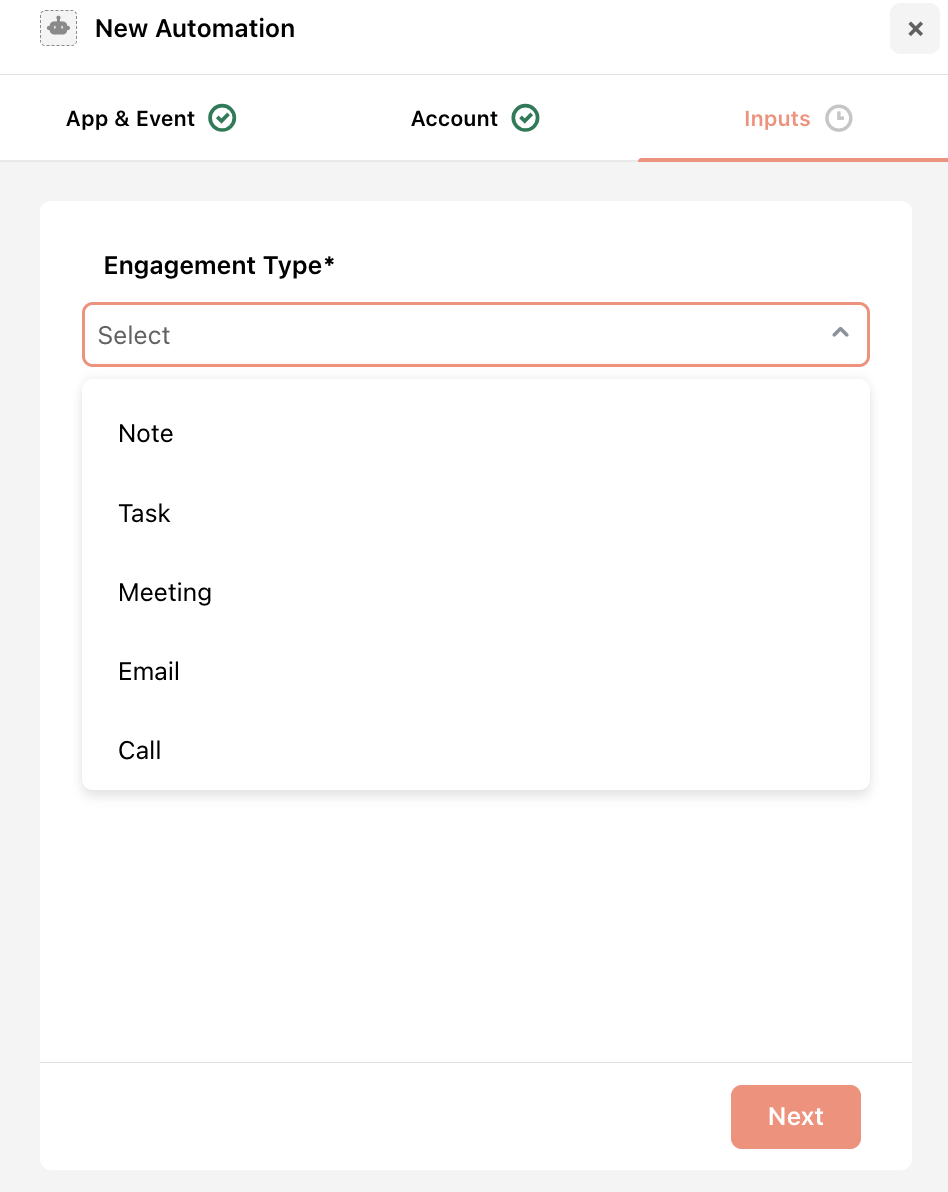
Based on your selection, provide the required fields:
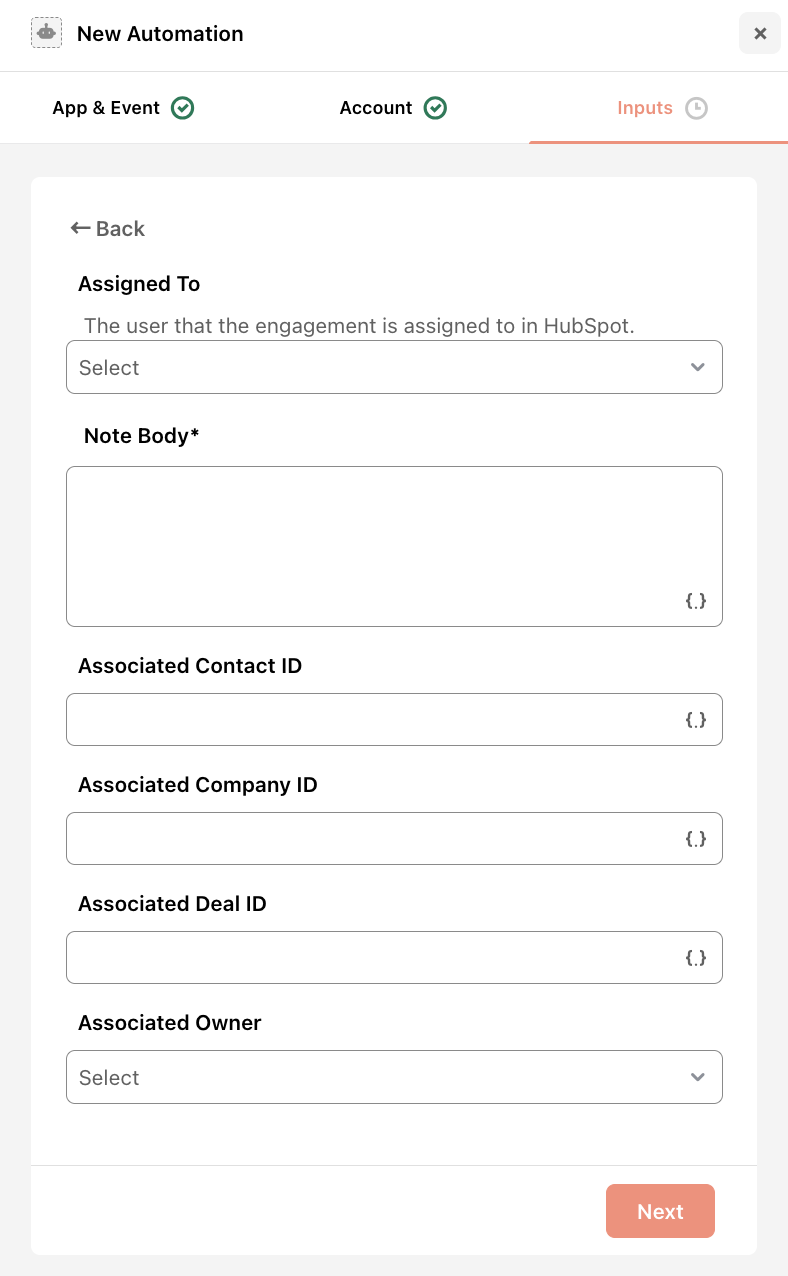
For Note, fill in the following details:
Assigned To
Note Body*
Associated Contact ID
Associated Company ID
Associated Deal ID
Associated Owner
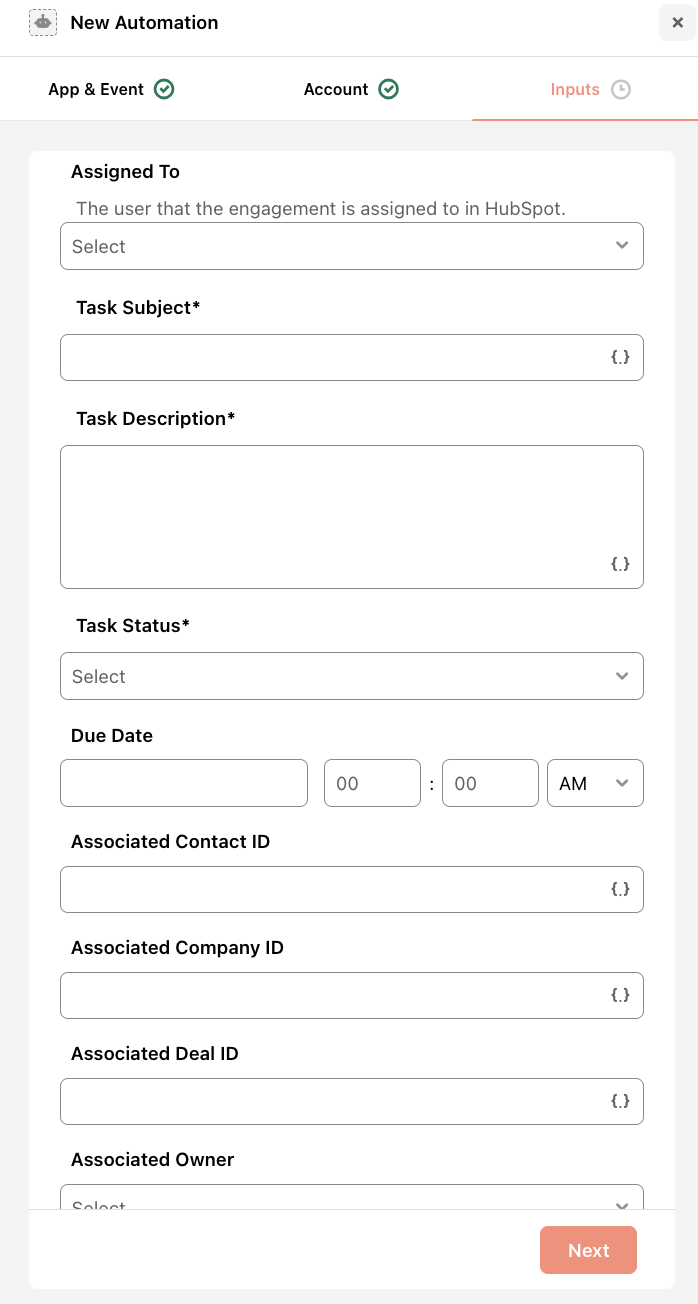
For Task, fill in the following details:
Assigned To
Task Subject*
Task Description*
Task Status*
Due Date
Associated Contact ID / Company ID / Deal ID / Owner
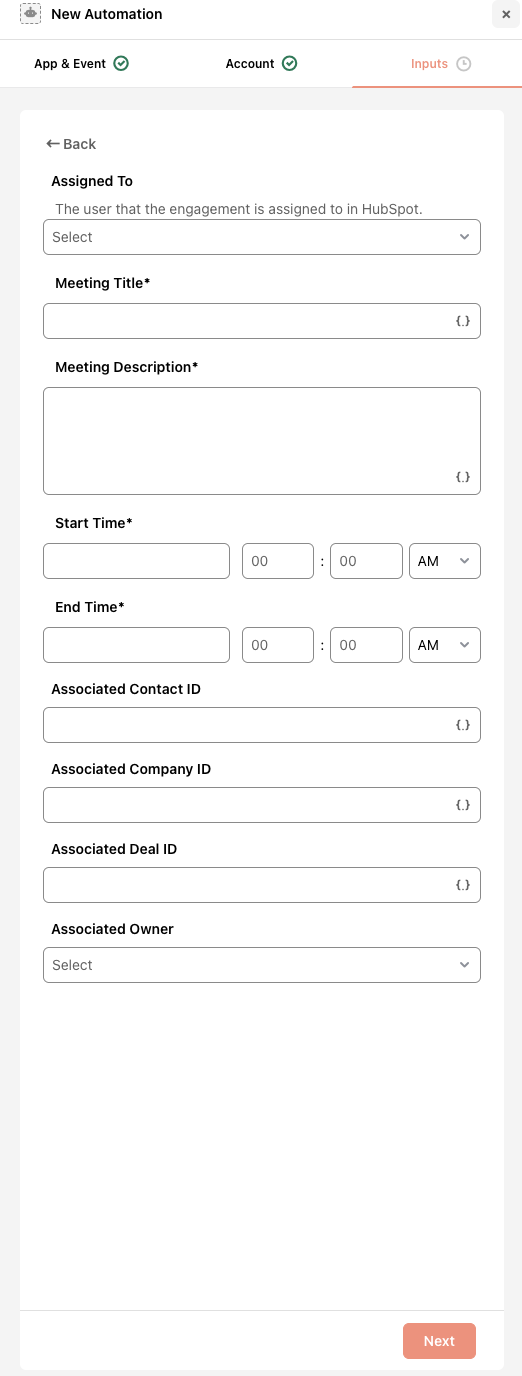
For Meeting, fill in the following details:
Assigned To
Meeting Title*
Meeting Description*
Start Time*
End Time*
Associated Contact ID / Company ID / Deal ID / Owner
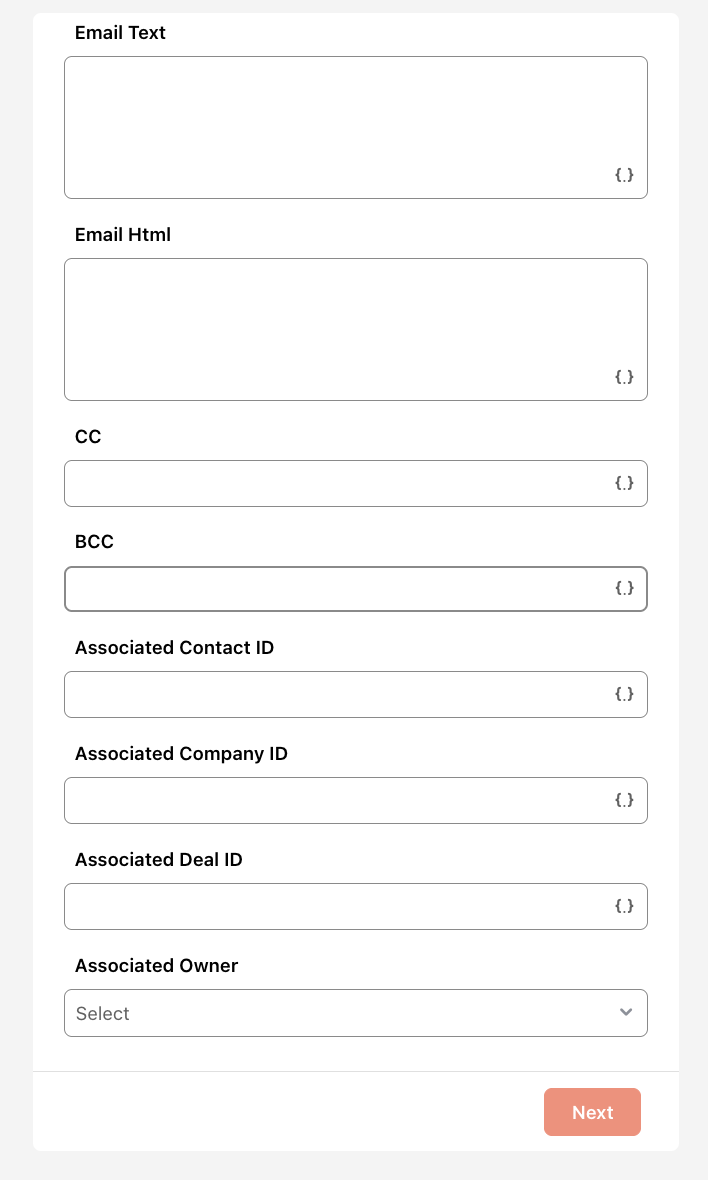
For Email, fill in the following details:
Assigned To
Sender Email Address*
Sender First Name*
Sender Last Name*
Recipient Email Address*
Email Subject*
Email Text
Email HTML
CC / BCC
Associated Contact ID / Company ID / Deal ID / Owner
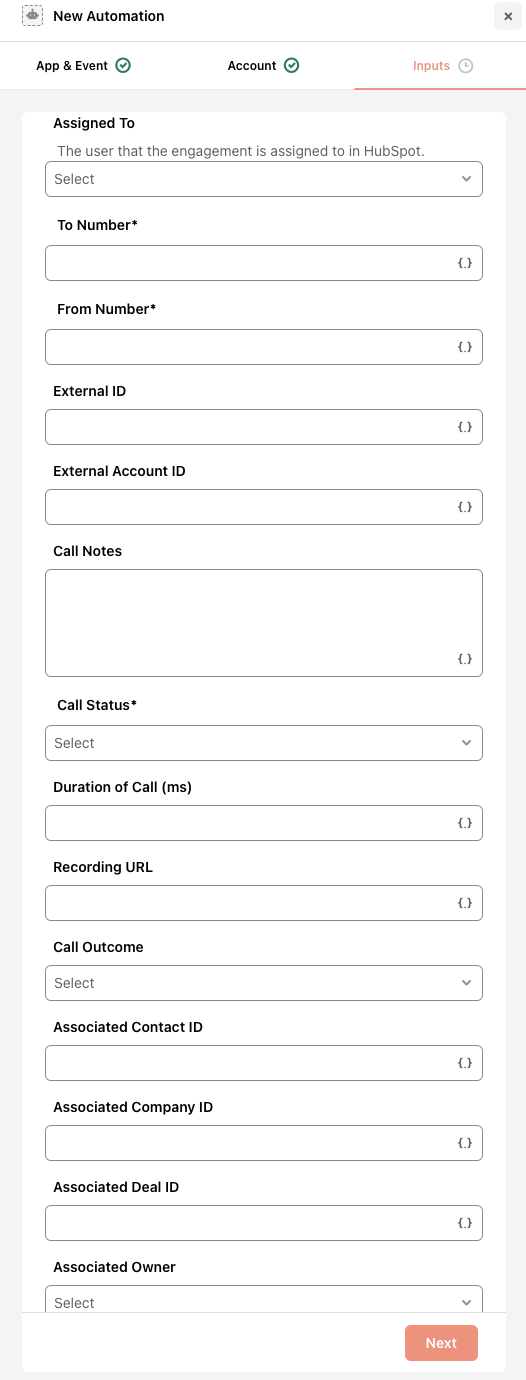
For Call, fill in the following details:
Assigned To
To Number*
From Number*
External ID / External Account ID
Call Notes
Call Status*
Duration
Recording URL
Call Outcome
Associated Contact ID / Company ID / Deal ID / Owner
If you choose Create Association:
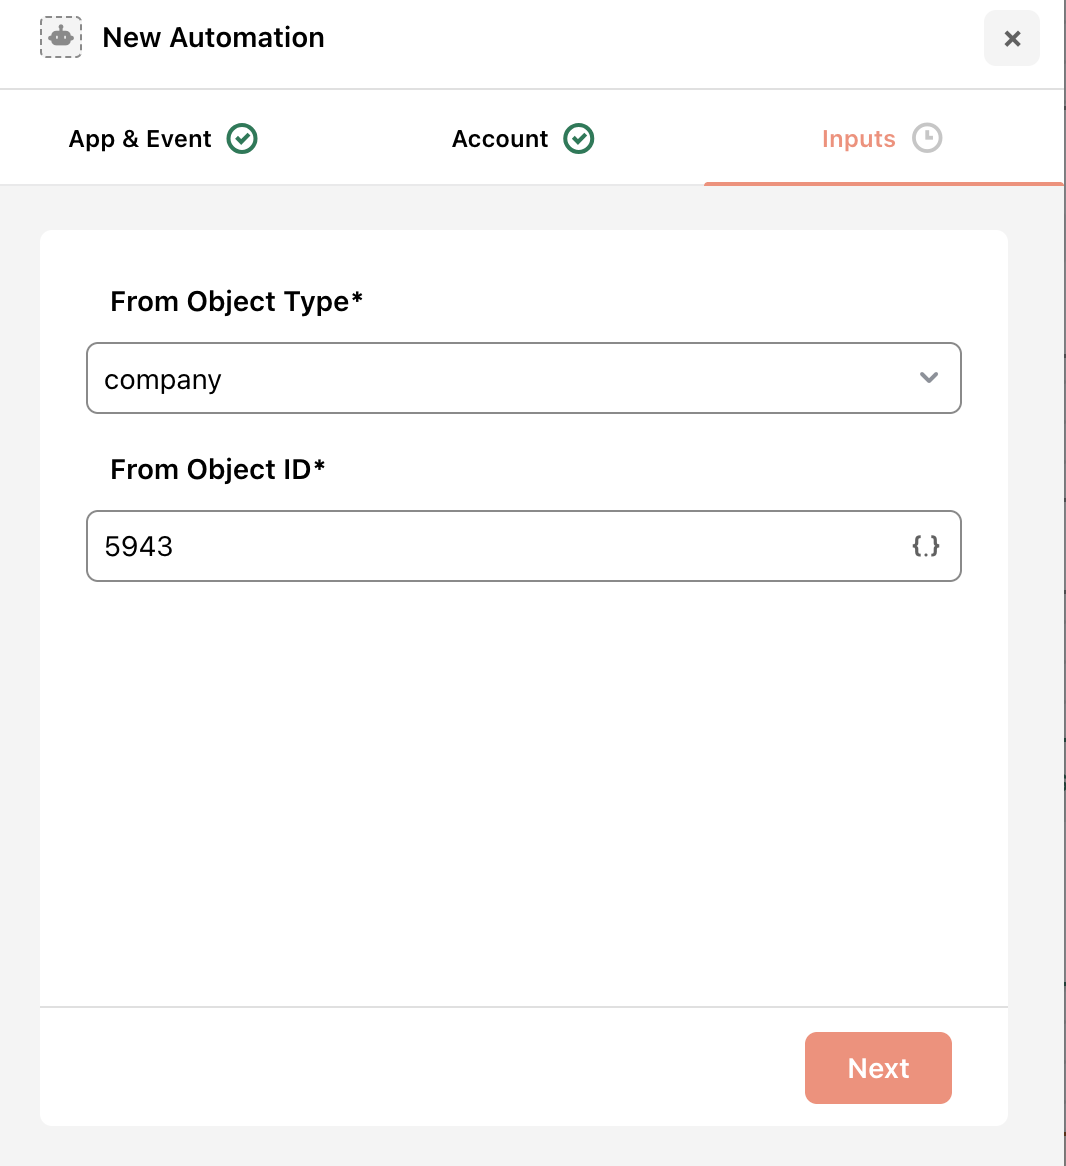
Fill in the required Input details:
From Object Type*
From Object ID*
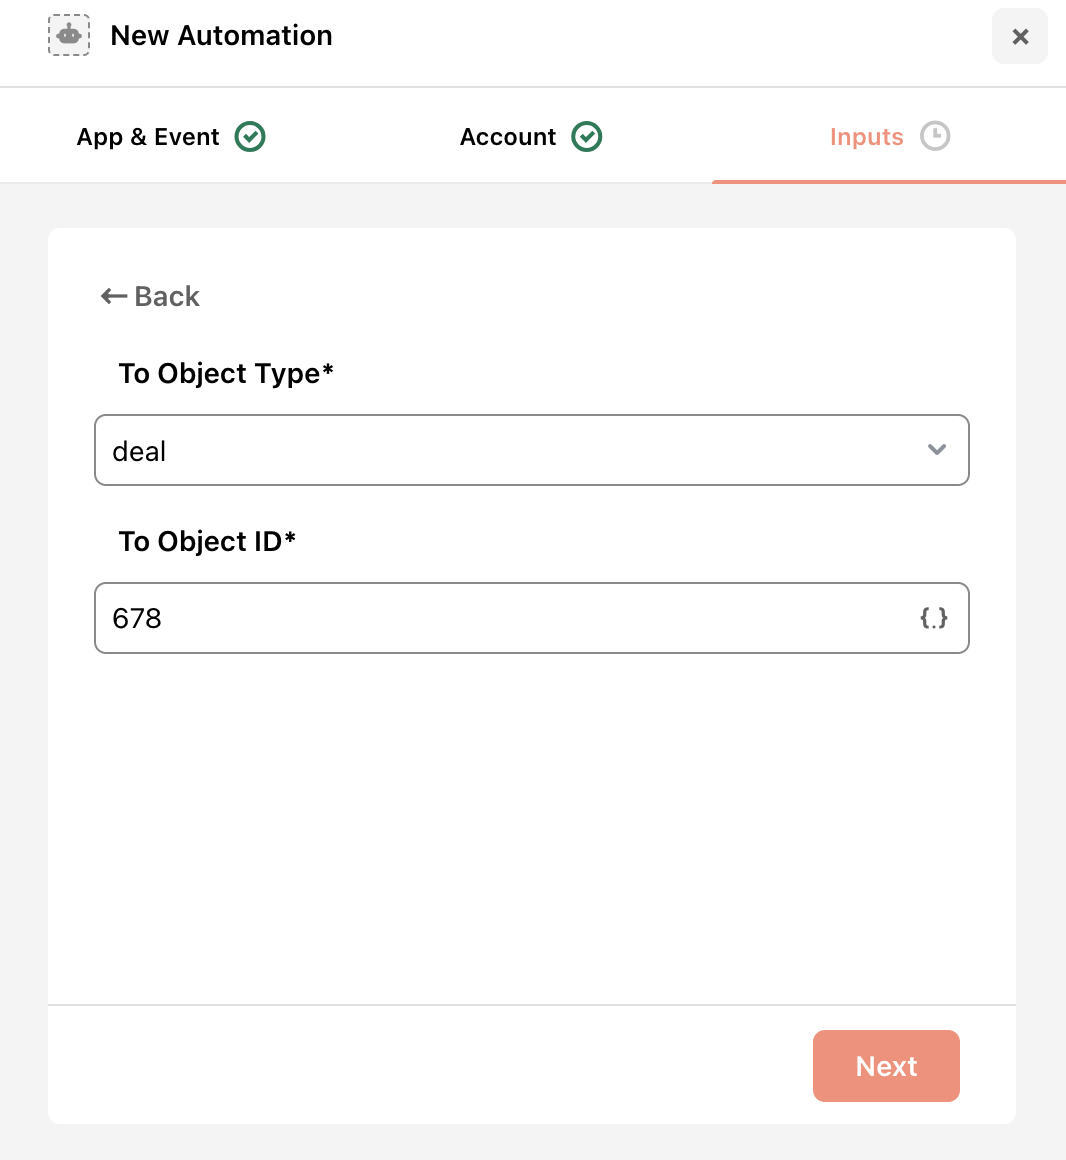
To Object Type*
To Object ID*
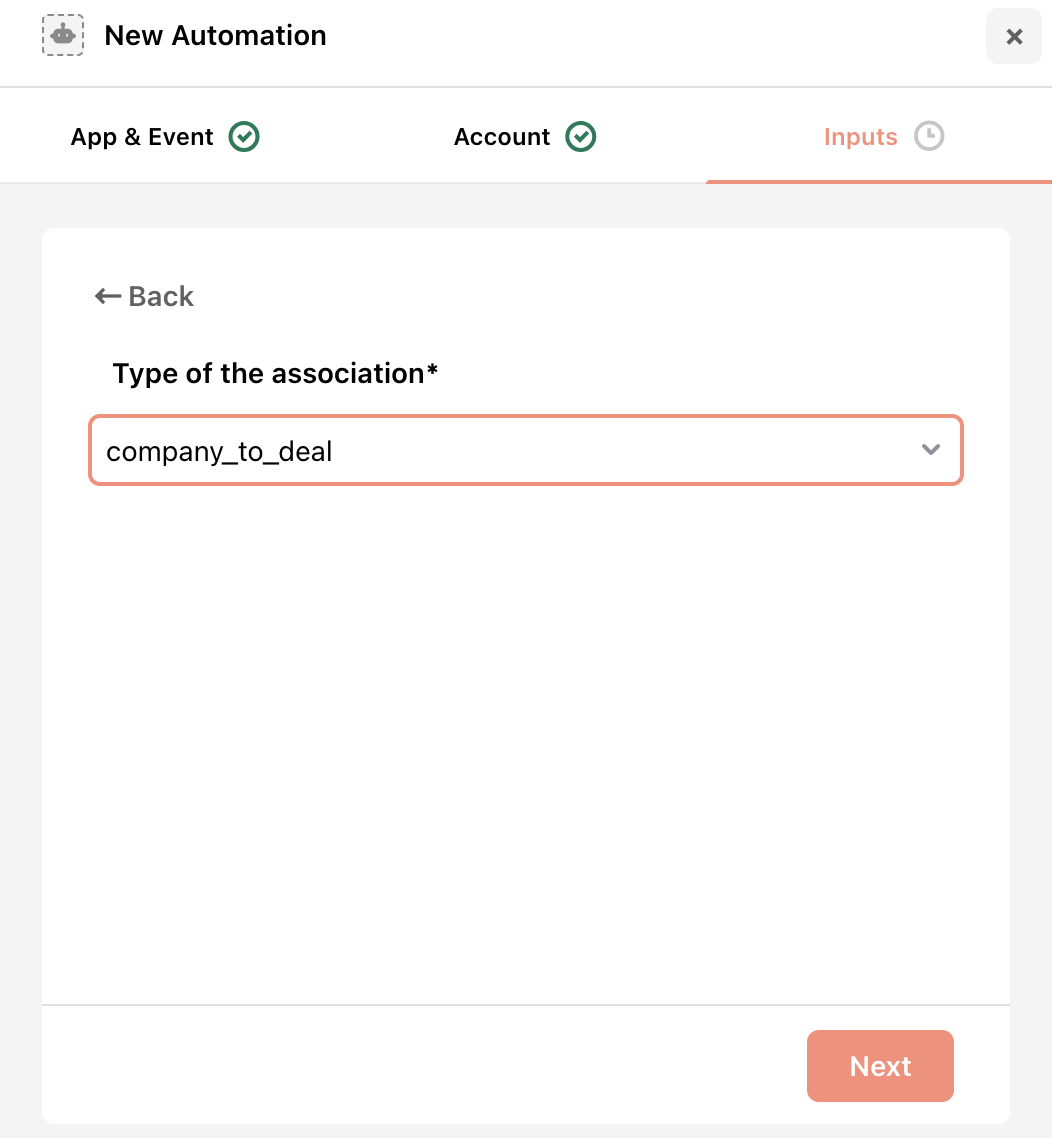
Type of the Association*
Click Next, then Add Automation.
If you choose Create Company:
Fill in the following input details:
Company Name*
Company Domain Name
Phone Number
Street Address / Street Address 2
City / State / Postal Code / Country
Description
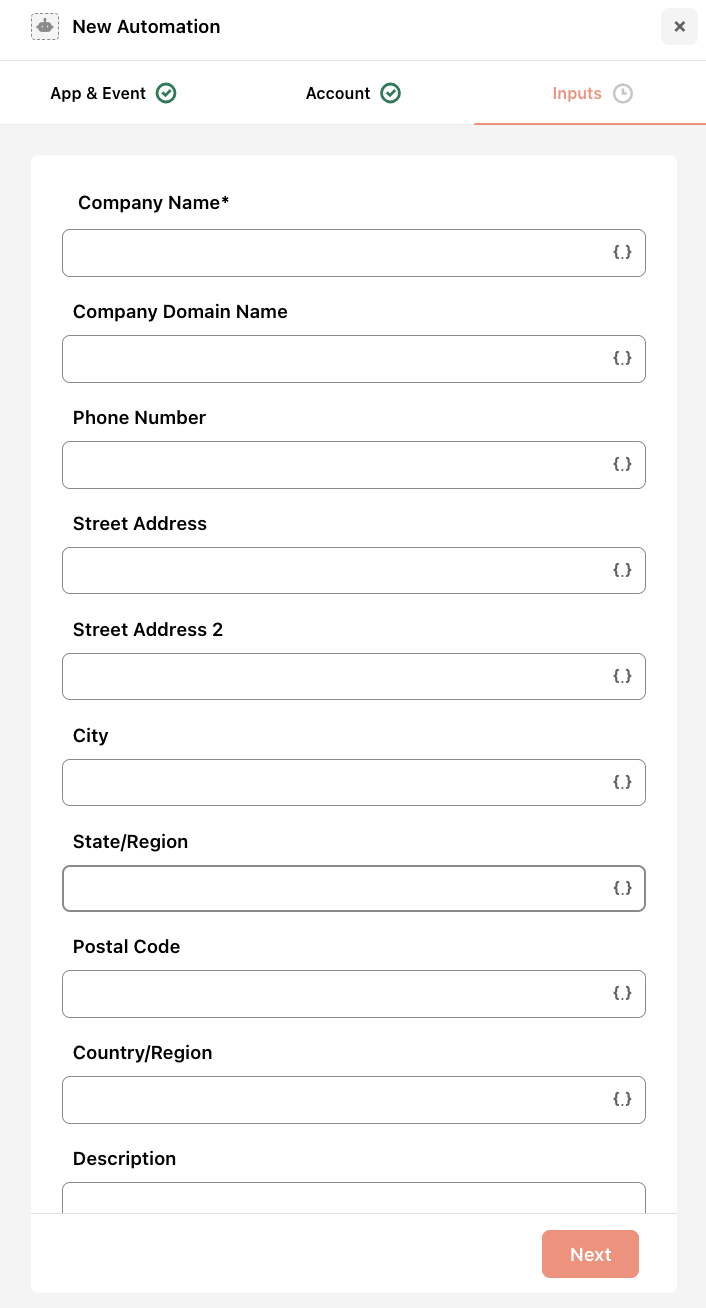
Click Next, then Add Automation.
If you choose Create Deal:
Enter the following deal inputs:
Deal Name*
Deal Pipeline*
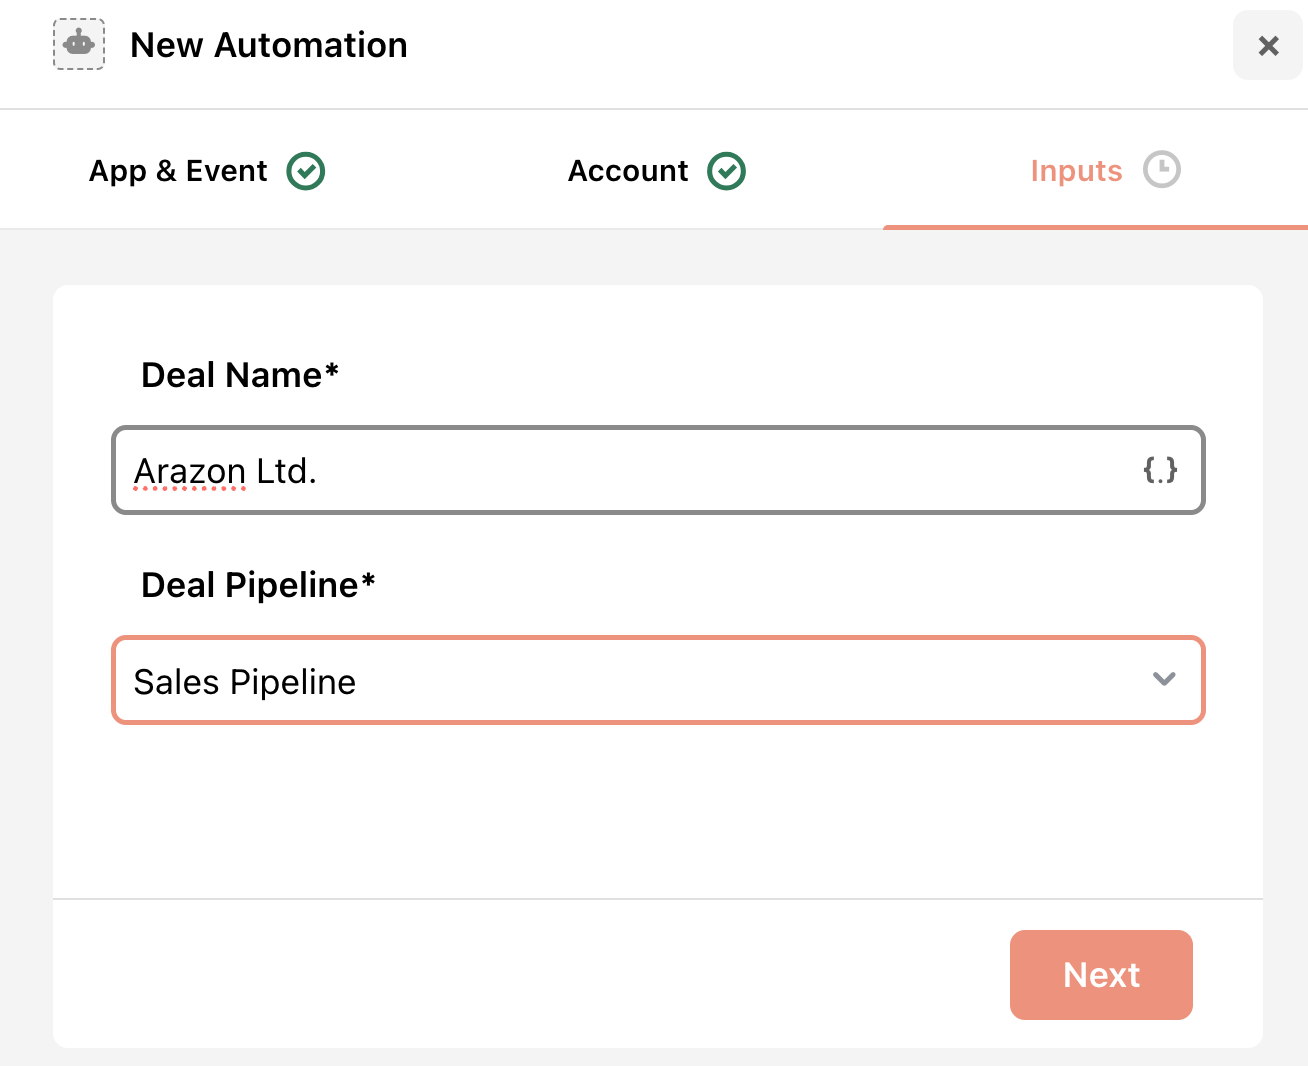
Deal Stage*
Deal Revenue
Deal Description
Deal Owner
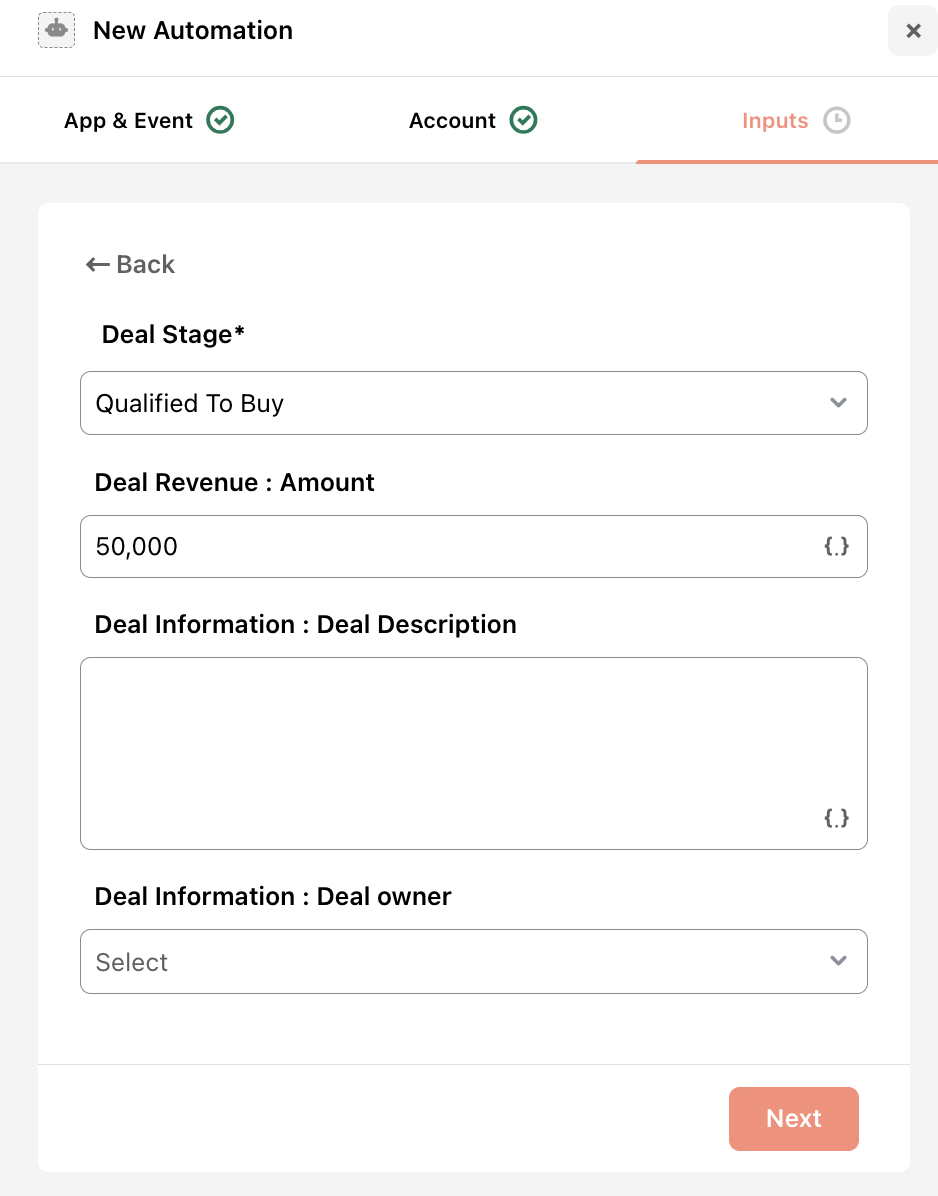
Click Next, then Add Automation.
If you choose Update Deal:
Enter the Deal ID* that you want to update.
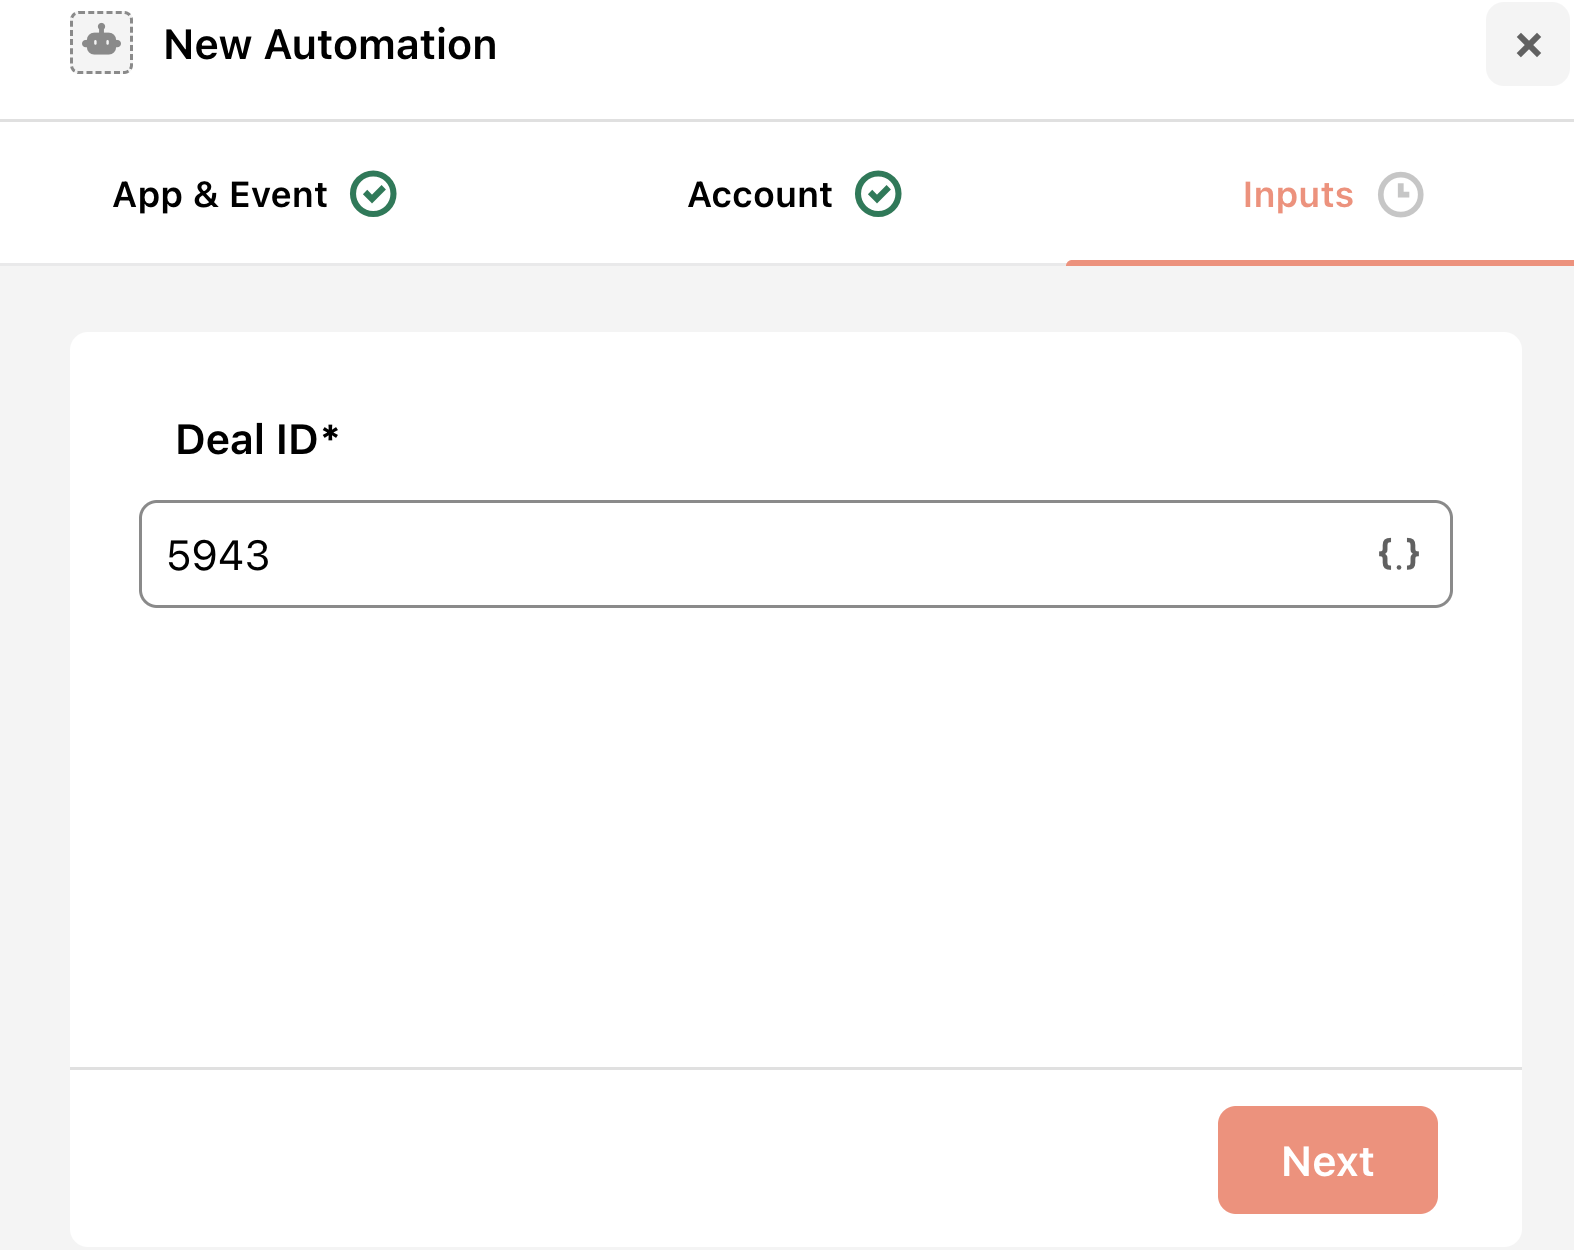
Then update any of the following:
Deal Name, Pipeline, Stage, Revenue
Deal Description, Owner, Currency, Brands
Traffic Source, Forecast Category, Deal Probability
Attribution, Campaign, Priority, Closed Won/Lost Reason
Global Line Item Settings, Net Pipeline Impact
Shared Users, Owning Teams, and other HubSpot custom fields
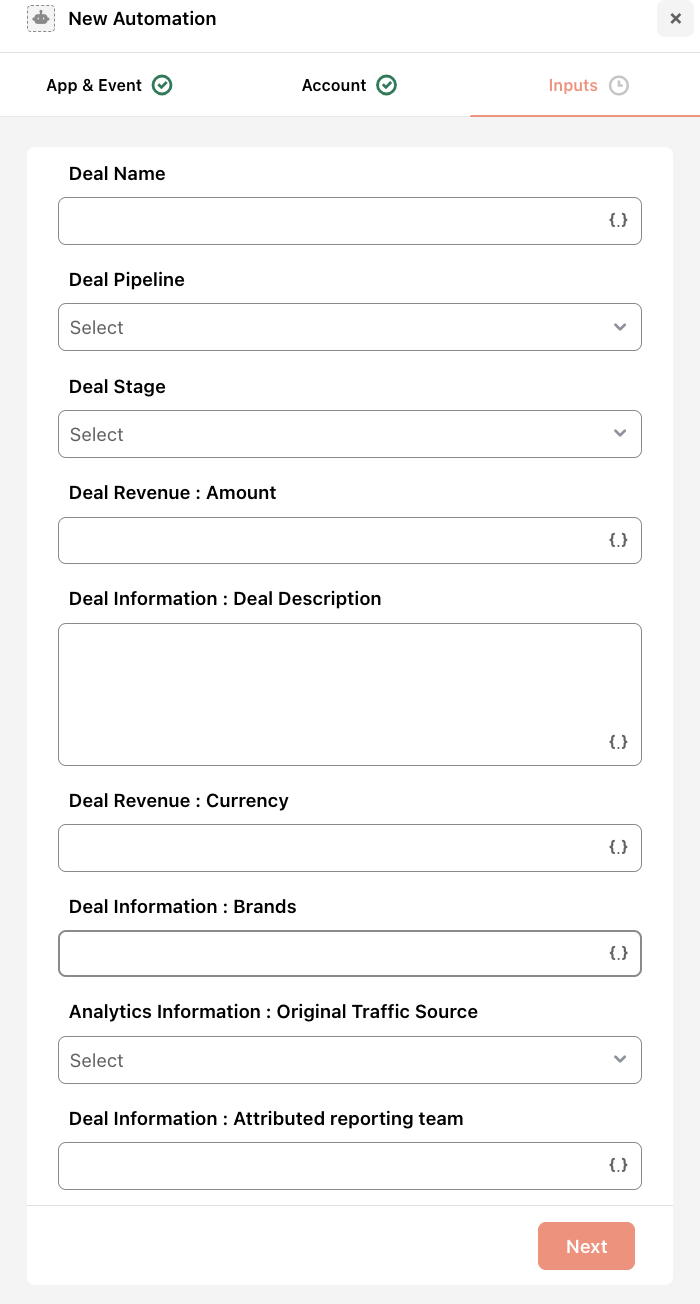
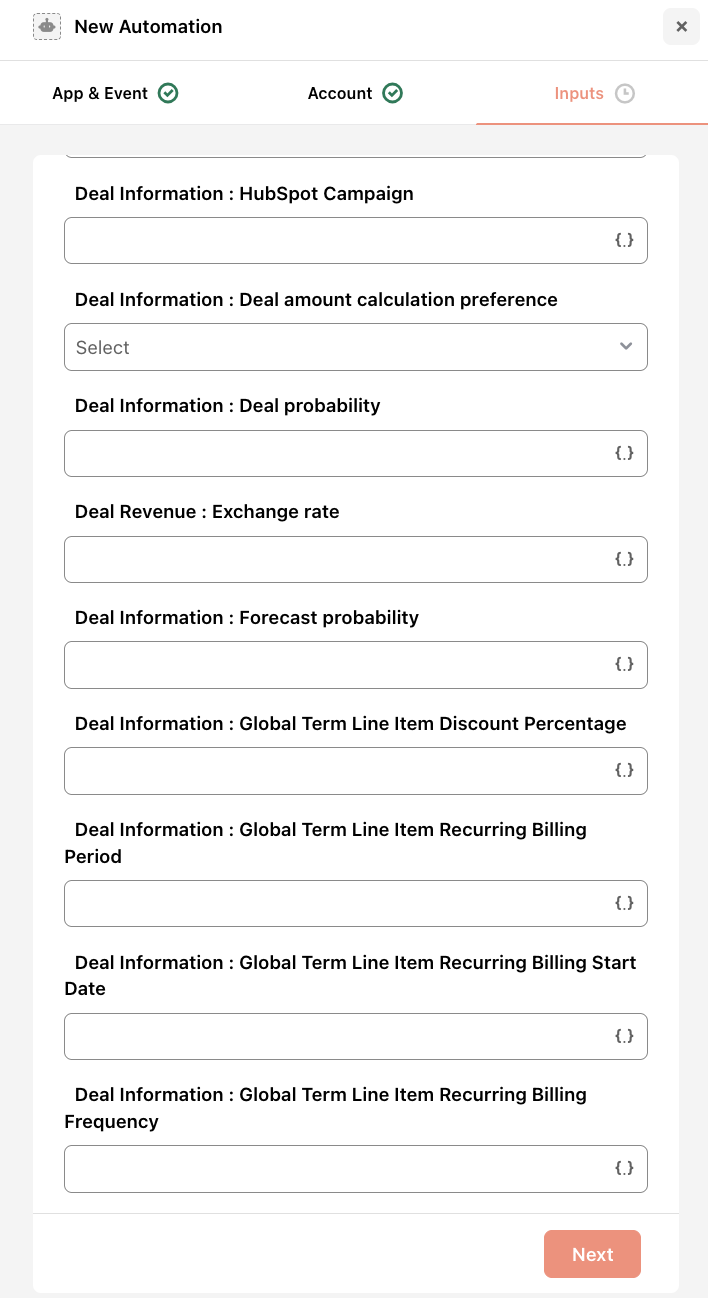
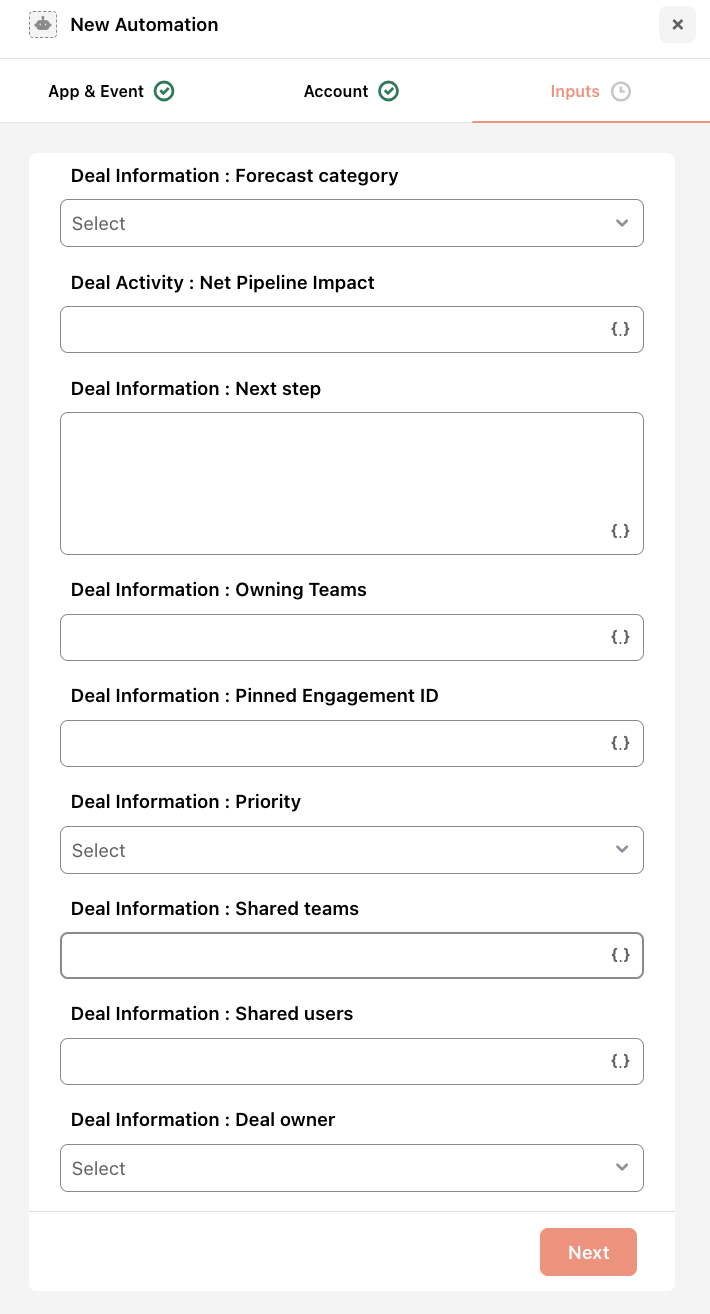
Click Next, then Add Automation.
If you choose Update Company:
Enter the Company ID.

Then update the following:
Company Info: Name, Domain, Phone, Address, Industry
Web & Social: LinkedIn, Twitter, Logo, Description
Revenue, Employee Size, Lifecycle Stage
Ownership Info, Shared Teams, Pipeline, Campaigns
Any additional HubSpot-defined fields or properties
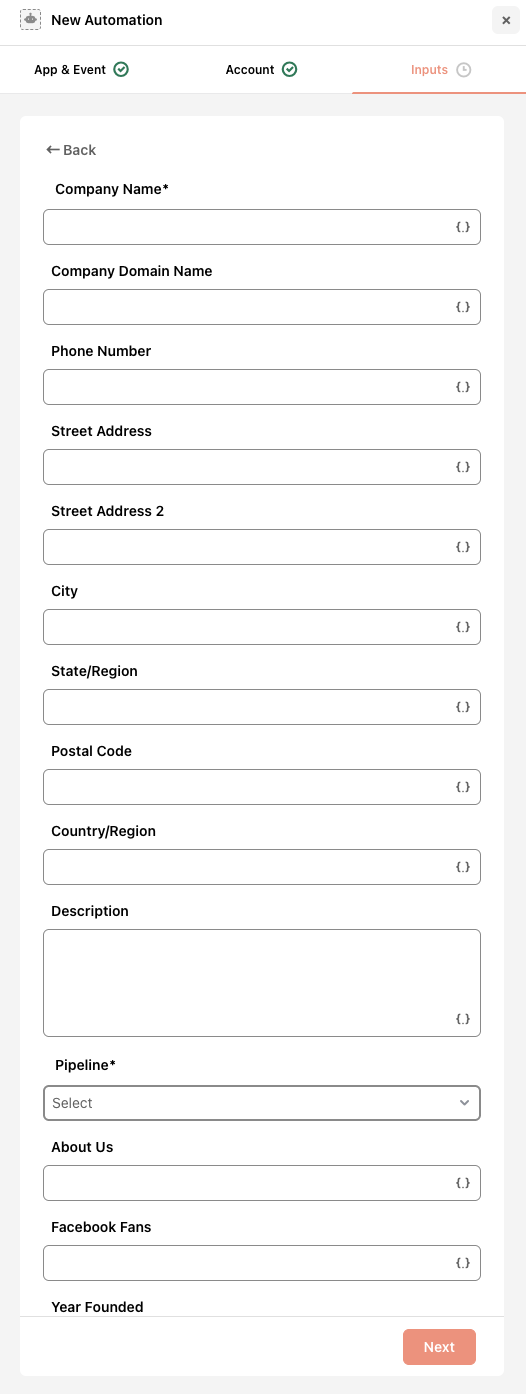
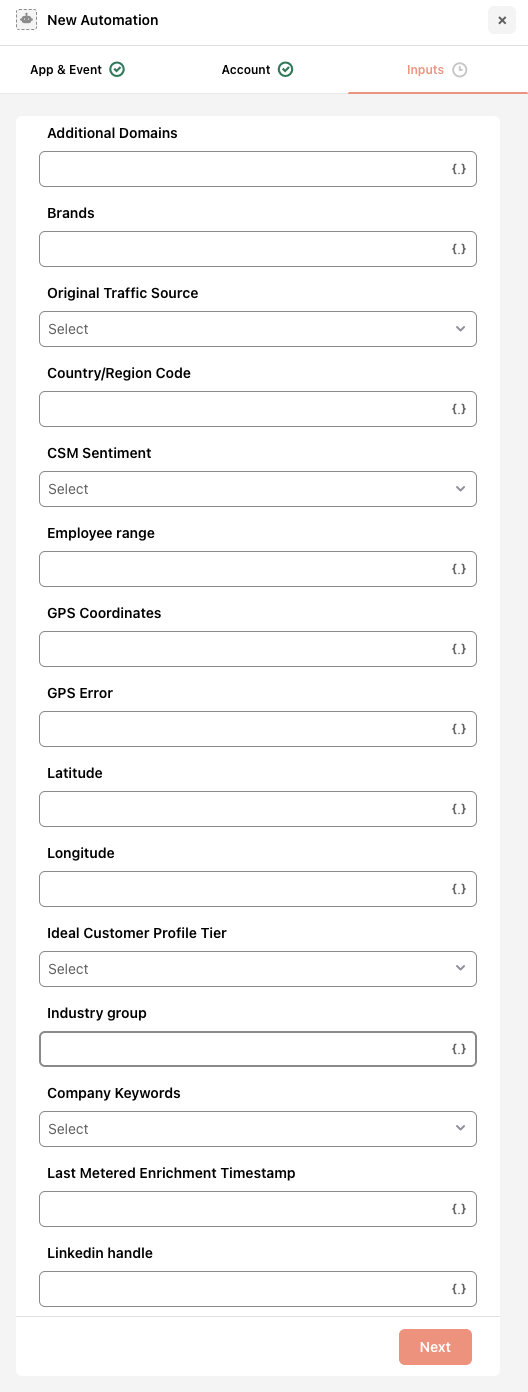
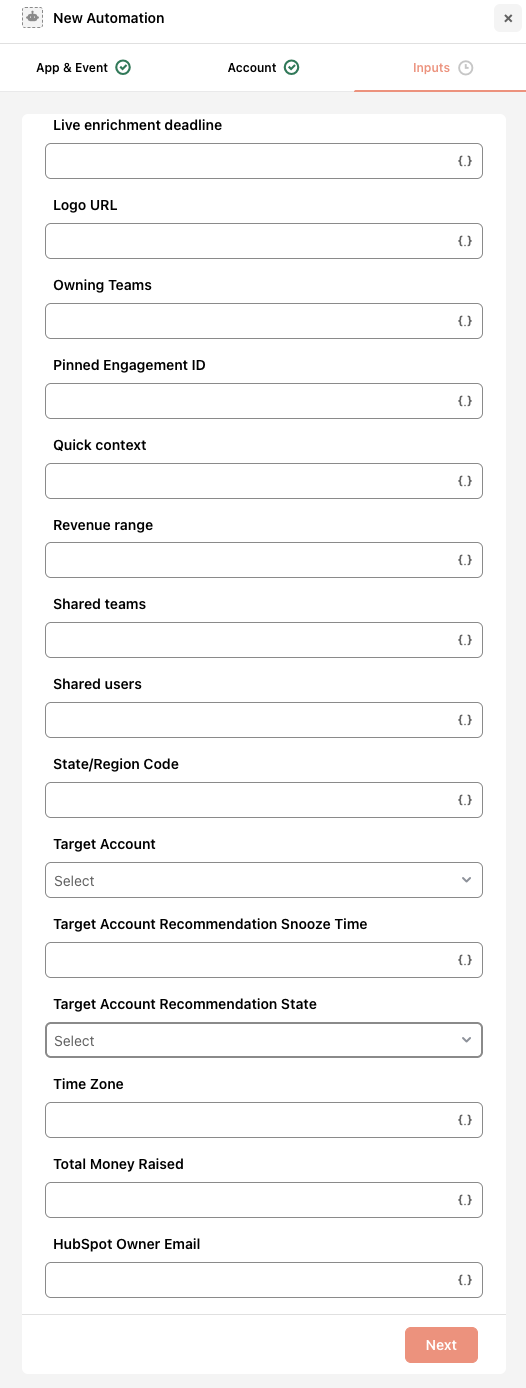
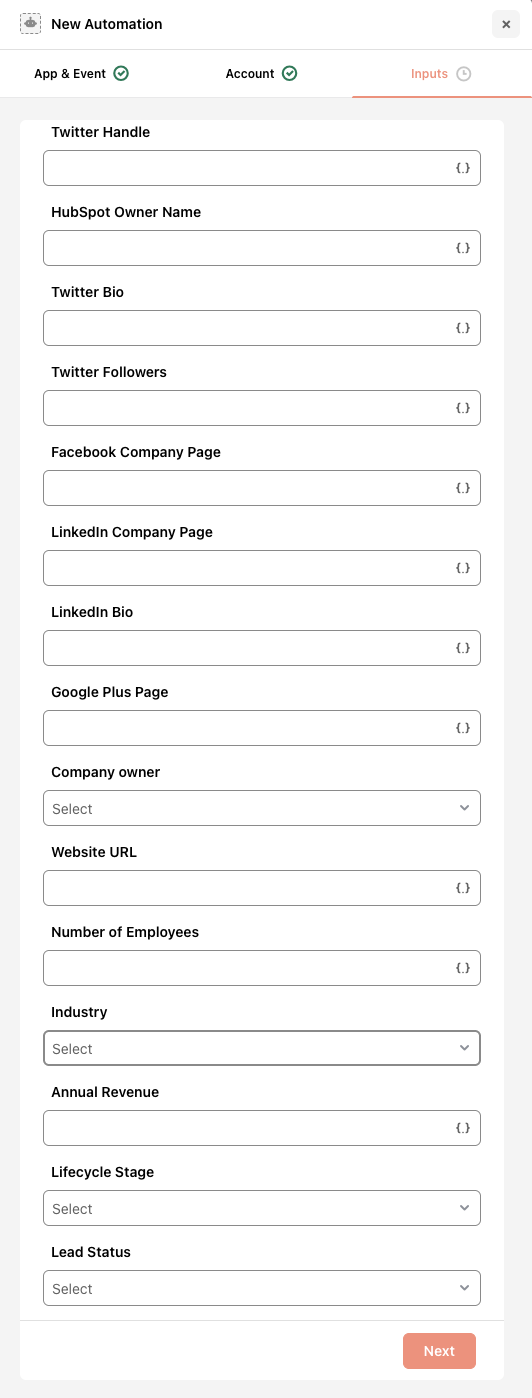
Click Next, then Add Automation.
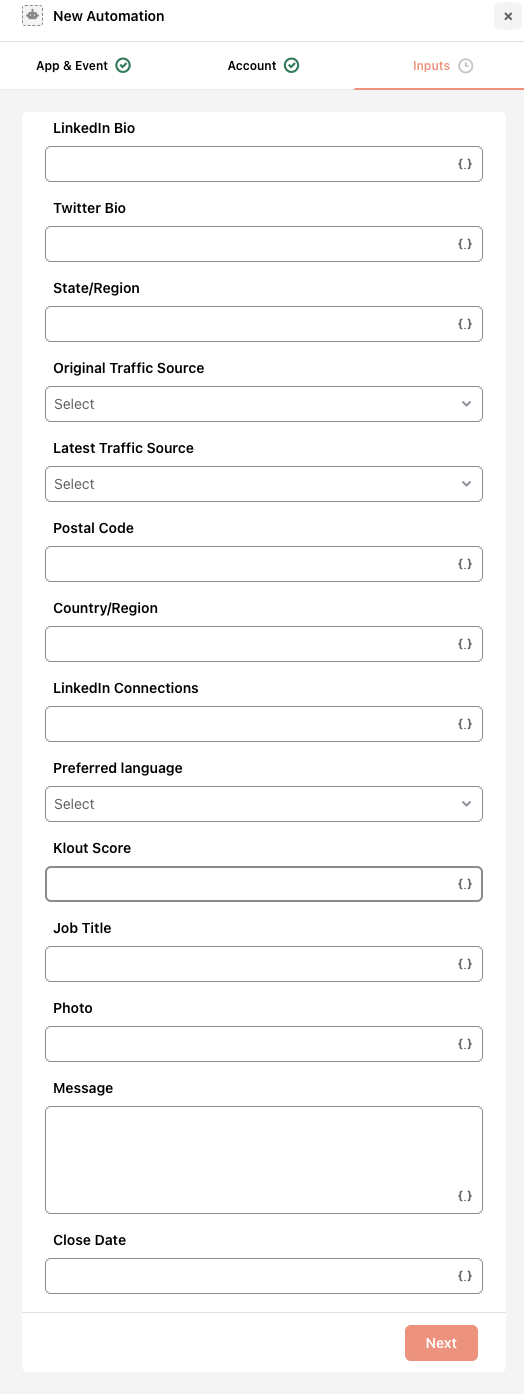
If you choose Update Contact:
Enter the Contact ID of the company you want to update:
Then update any necessary fields such as:
Email, Name, Phone Numbers
Company Info, Website, Job Title
Social Links, Status, Persona
Lifecycle Stage, Preferred Channels, Address
Lead Status, Owner, Team Associations
Any HubSpot contact-specific custom fields
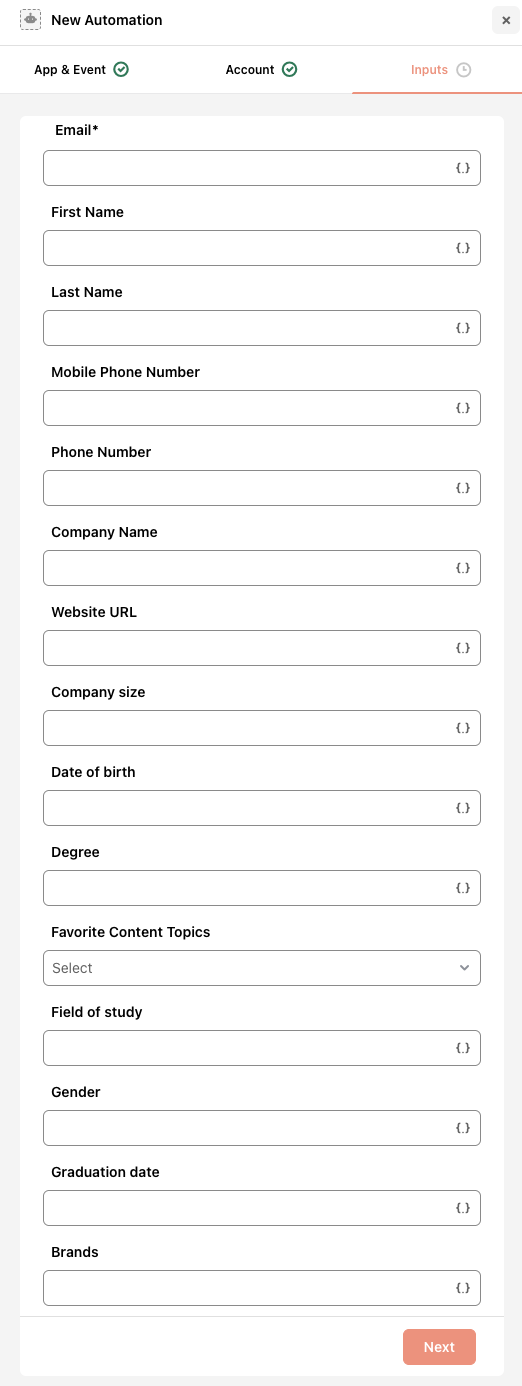
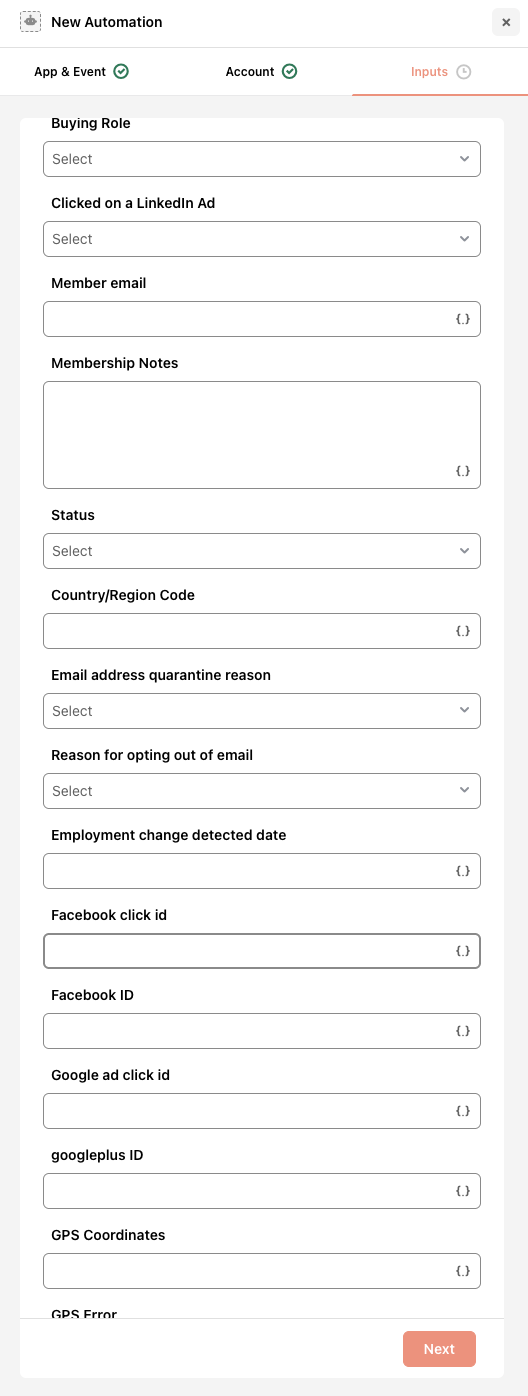
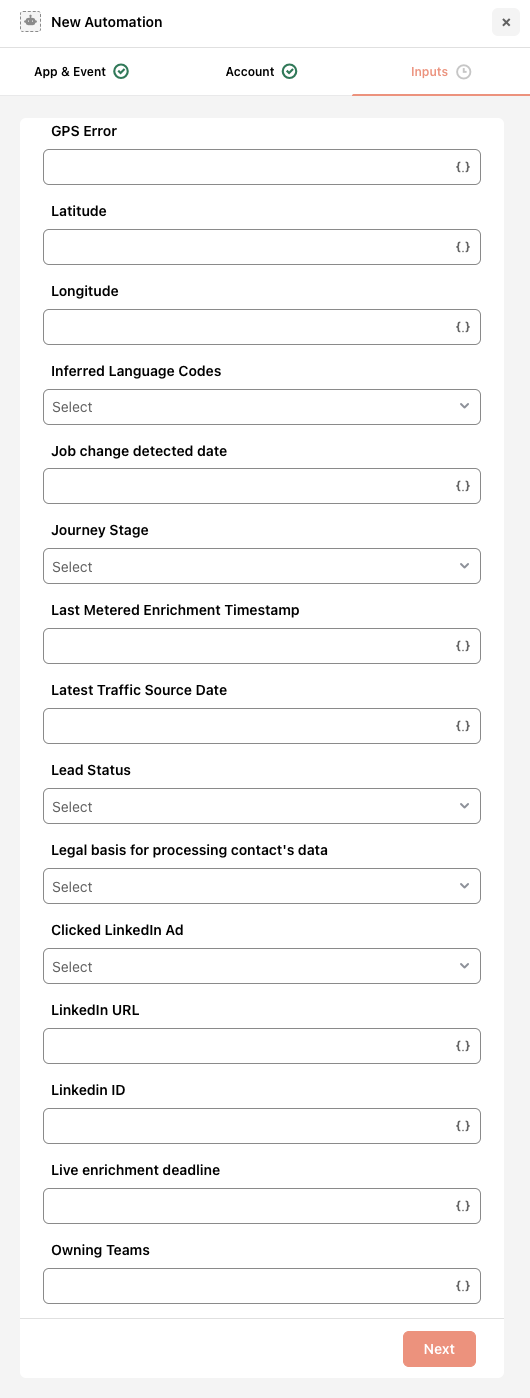
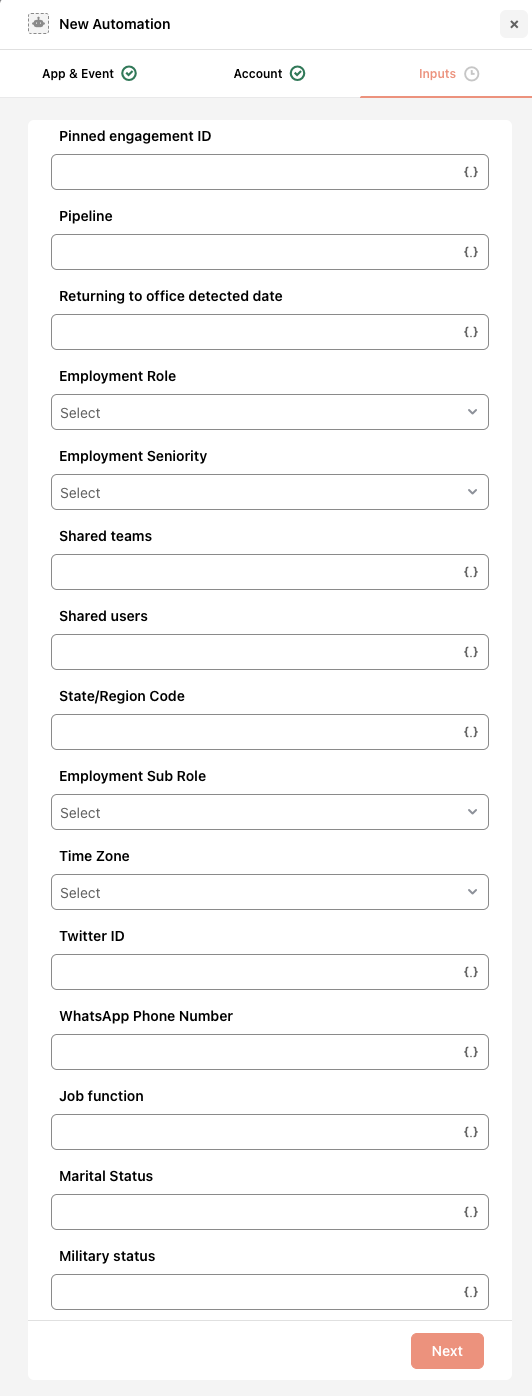
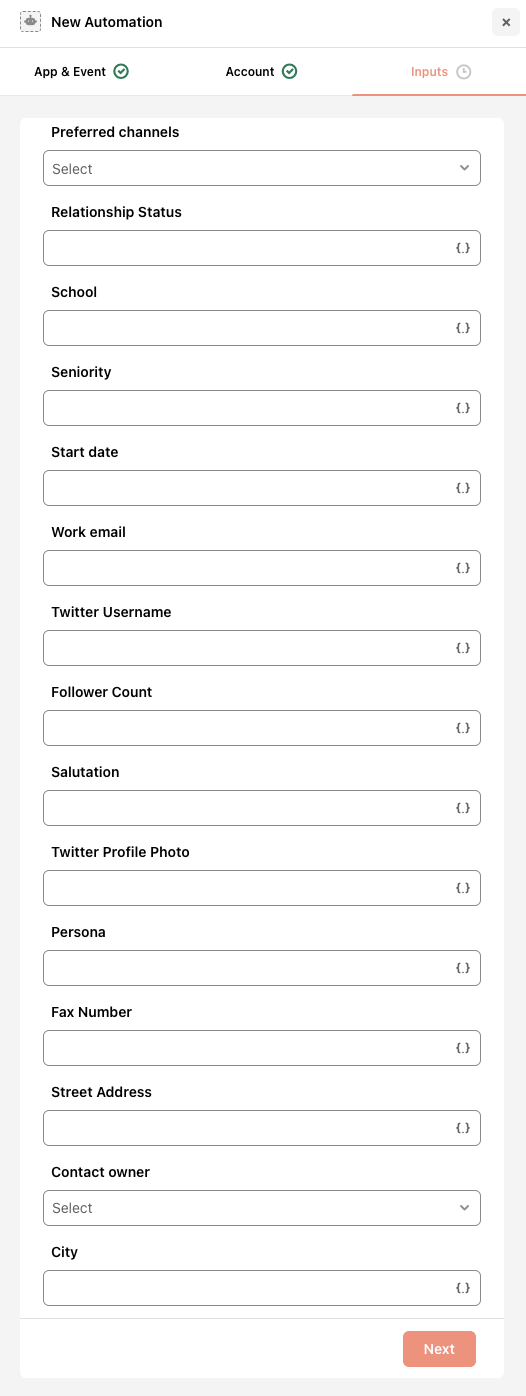
Click Next, then Add Automation.
Managing the HubSpot Automation
Hover over the automation that you want to edit.
Click the “Edit” icon.
Update app, event, account, or field inputs.
Click Save Changes.
To delete an automation, click the Delete icon.
You can only edit automations that have not been executed. Once triggered, automations cannot be reopened nor edited.
Mapping Automations and Events in a Flow
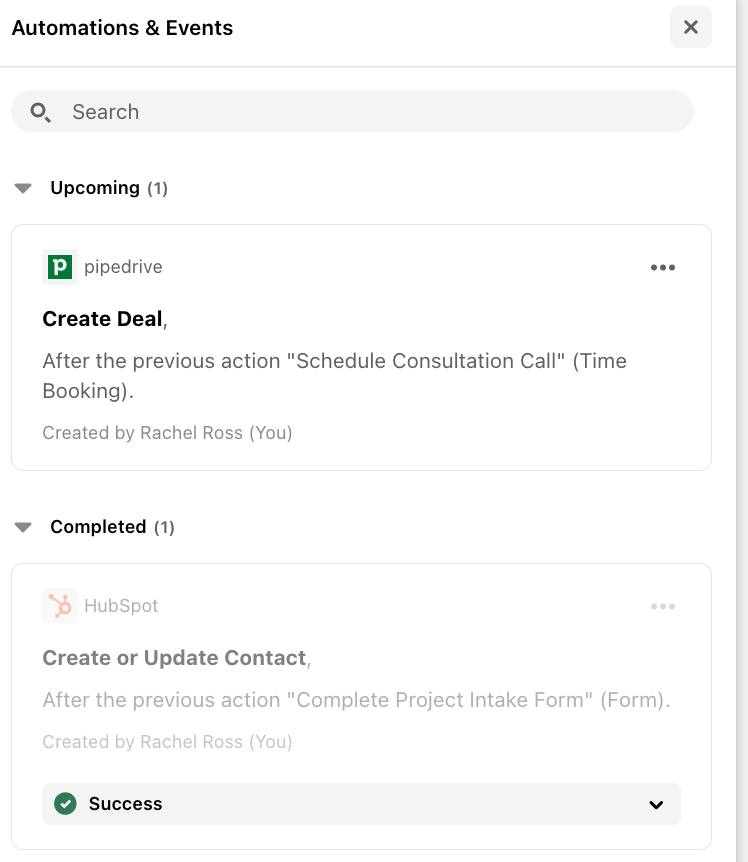
Once a Flow is initiated, click on the “...” ellipsis icon next to the Flow Workspace name and select Automations & Events.
Here, you can view all upcoming and completed automations and events.
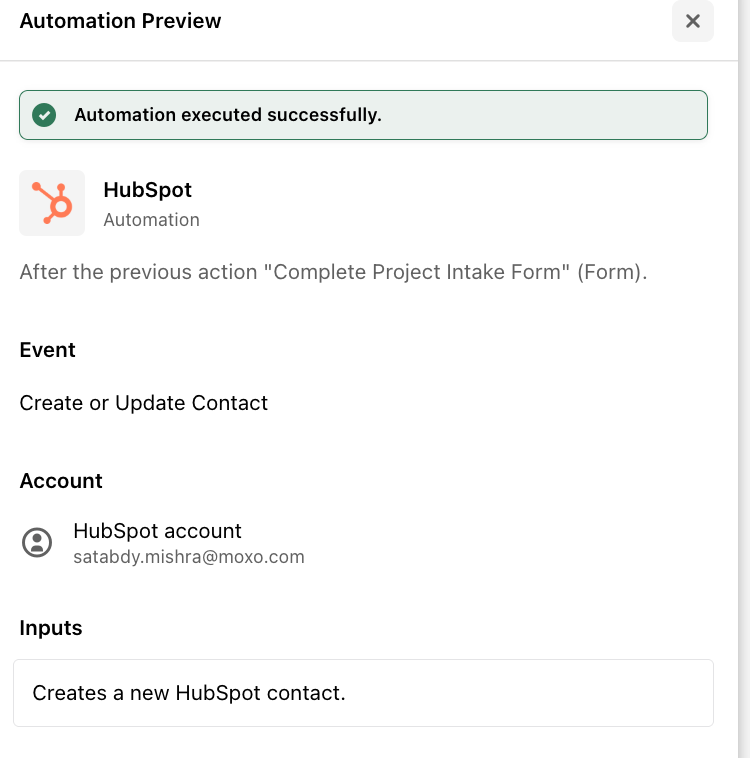
To confirm that an automation was successfully executed:
Go to the Completed section under Automations & Events.
If successful, the message will read "Automation Executed Successfully". Otherwise, an error message will appear.
Mapping the Trigger in the Third-Party Application
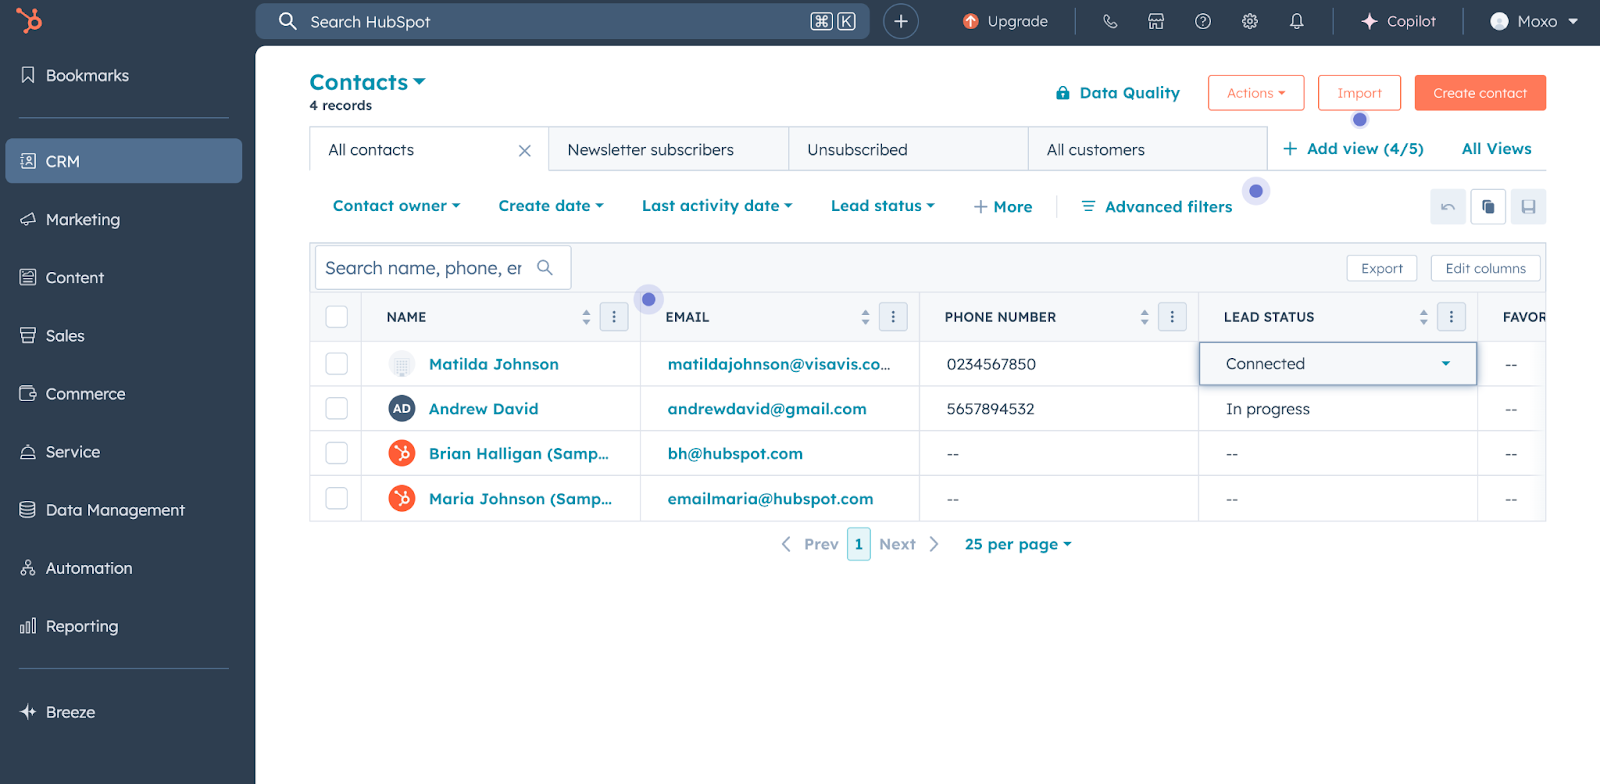
To verify if an object successfully created or updated in HubSpot:
Log in to your HubSpot account.
Navigate to the relevant Contact, Deal, Company, or Engagement section.
Verify that the record reflects your automation input.
Best Practices
Pre-configure your HubSpot records: Set up pipelines, lifecycle stages, deal stages, and object associations in advance.
Use DDR for dynamic mapping: Reduce manual input by dynamically referencing workspace and action data.
Validate object IDs: For updates and associations, confirm object IDs ahead of time to avoid runtime errors.
Audit Flow automations regularly to maintain sync with evolving CRM structures.